Google Authenticator is one of many two-factor authentication applications used to add an extra layer of security to various online accounts on websites including Microsoft, Facebook and Amazon amongst many others. The app adds this extra security to two-factor authentication secured sites by generating another code for log in. Each time you log in to an online account, you’ll be required to input your normal password and a safe code from the Authenticator app.
So that’s the official Google Authenticator app for the Android and iOS mobile platforms. The search titan doesn’t offer a native official app for Windows 11 machines, but there are some workarounds that you can still utilize it from the desktop and this is what we’ll discuss in this article.
Use Google Authenticator on Windows 11
Several of third-party programs are available on the web for free, which uses Google Authenticator on Windows 11. WinAuth and WinOTP Authenticator are a few of these programs that are popular. We’ll show you the feature of these programs that allow you to use Google Authenticator on Windows 11. Plus, you’ll see here the method using Google Authenticator on popular web browsers.
It should be noted that to use the Google Authenticator window on these programs, first you must configure the program with a code from your Google Account. So, first of all, get a secure key from your Google Account Settings to configure aforesaid third-party programs.
Obtain Secure Google Authenticator Key in Windows 11
First, you will need to get a secure key from your Google Account’s settings to use the authenticator with the third party apps.
So, here’s how to get secure Google Authenticator key in Windows 11, follow the steps as they are one by one.
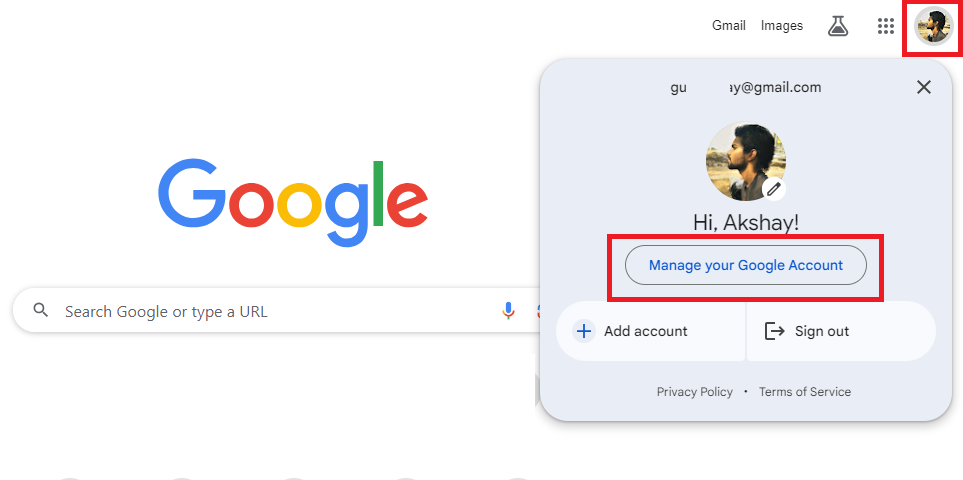
1. First of all, sign in to your Google Account in the internet browser of your choice. Then, click on your Account photo in the top right corner of the window and press the Manage your Google account button.
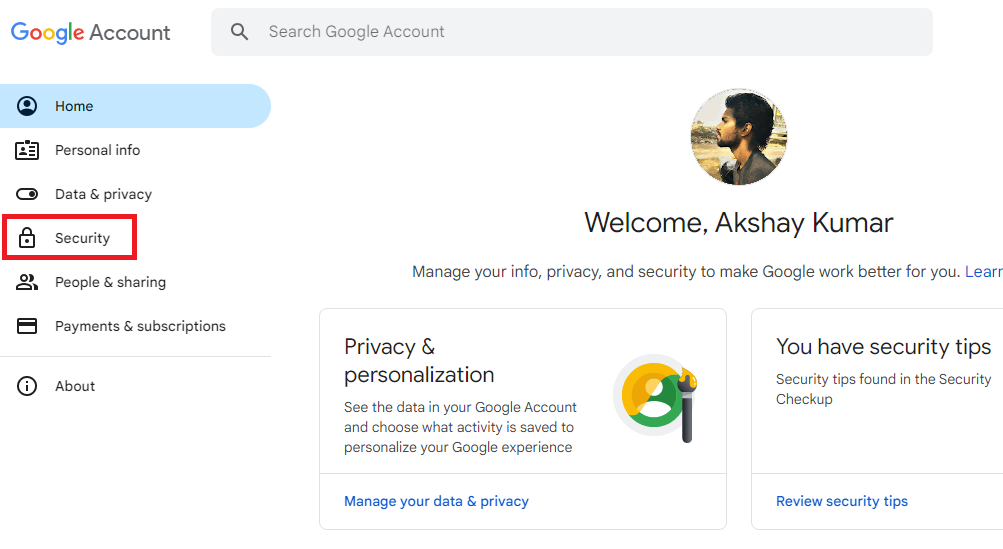
2. Then, click on the Security tab in the left navigation pane.
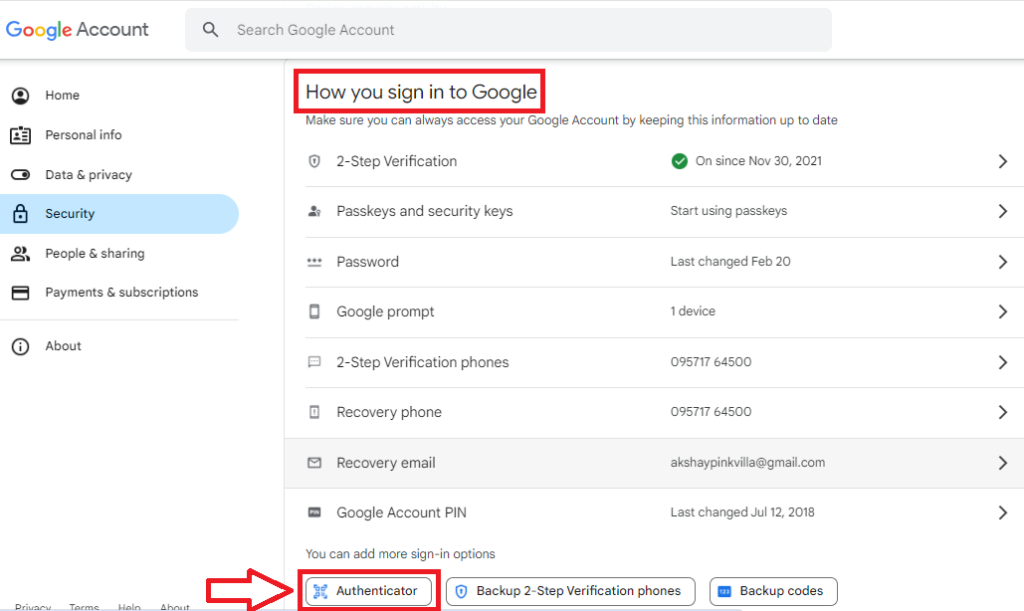
3. Now, scroll down till you find the “How you sign in to Google” section and press the Authenticator button.
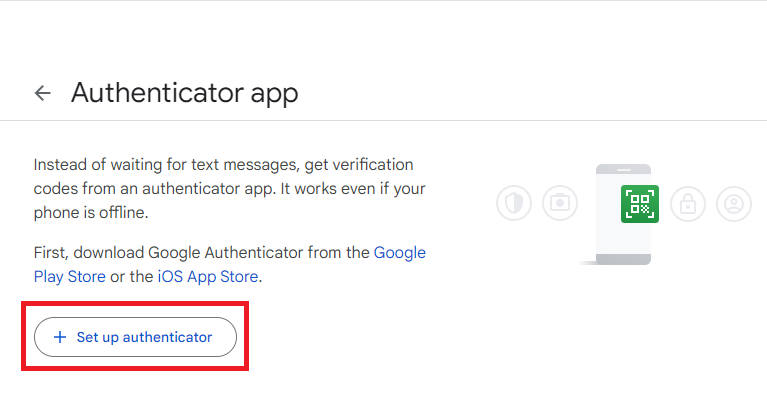
4. Then, hit the Set up authenticator button in the Authenticator app section.
5. Now, you will see a QR code in the next window. Just ignore it and click the Can’t scan it? link under the QR code.
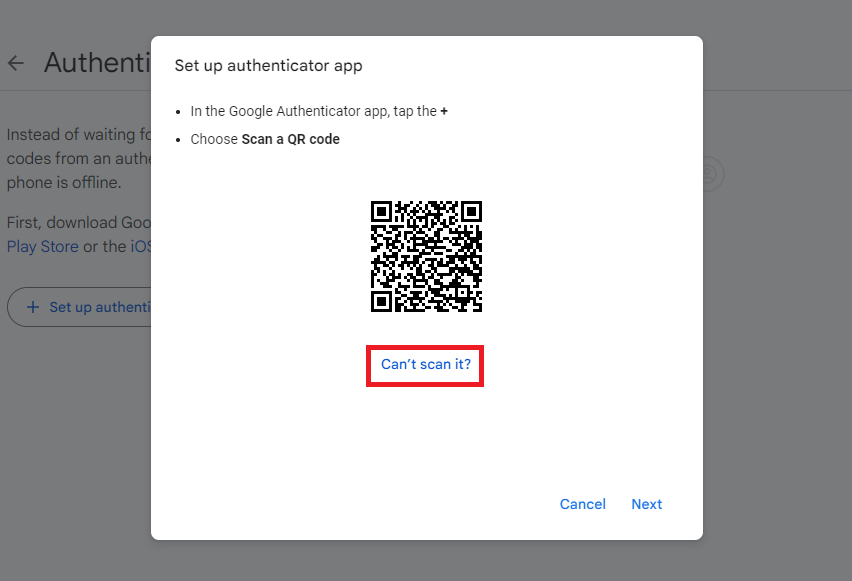
6. Then, copy the key that is mentioned in the window.
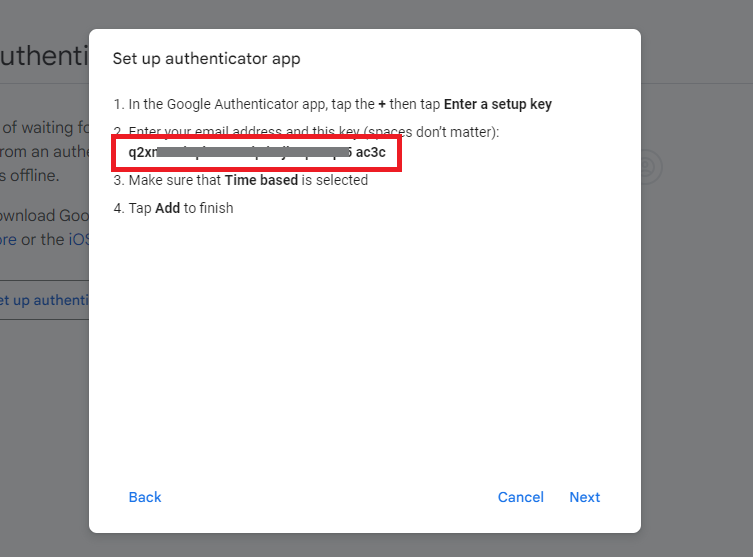
So, this is the key that you will need to use to add an authenticator program to your Google Account. Just save your keys somewhere safe on your computer, a notebook, or wherever you want; you can also try and save it in some note application on your smartphone. This key should not be shared with anyone, because if someone has that, they can steal your Google account, and all your private information.
Use Google Authenticator with Third Party Programs
Now that you have the secret key, it’s time to use it with a third-party program on your Windows 11 PC. We’ll use three third-party programs as an example: WinAuth, WinOTP, and Authy. They all work pretty much the same.
Just get your secure Google Authenticator secret key and use it with these programs. Setup will be very similar to how you did it with the app: you’ll be prompted to scan a QR code and enter a six-digit code to verify.
The process is very simple, and just like setting up Google Autheticator on your phone, the apps on your Windows 11 PC can generate a different code every 30 seconds, just like a typical hardware OTP token.
1. Using WinAuth
One of the most popular third party programs use Google Authenticator on Windows 11 is WinAuth. It is free and open source, and specifically for Windows. It is available on GitHub and does not require installation.
Download and run the app. Unzip the downloaded file, and run the application.
And that’s it! You now have Google Authenticator on Windows 11 without a Windows Phone!
1. First, download the latest version of WinAuth by visiting this GitHub link and then click on the downloaded ZIP file.
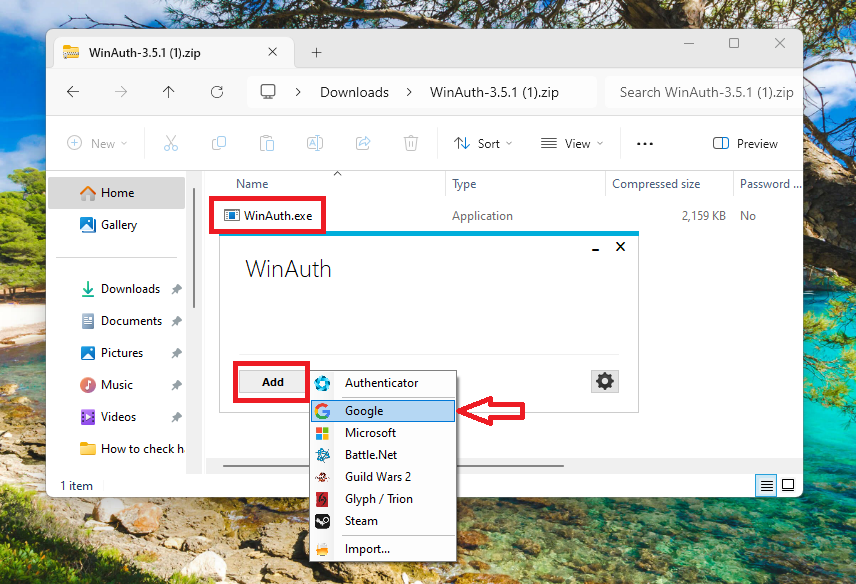
2. Then, double click on the WinAuth.exe file in the Explorer and hit the Add button, and select Google in the drop down menu.
3. On the next window, add a name to the authenticator and paste the secure key that you obtained earlier. Then, click on the Verify Authenticator button.
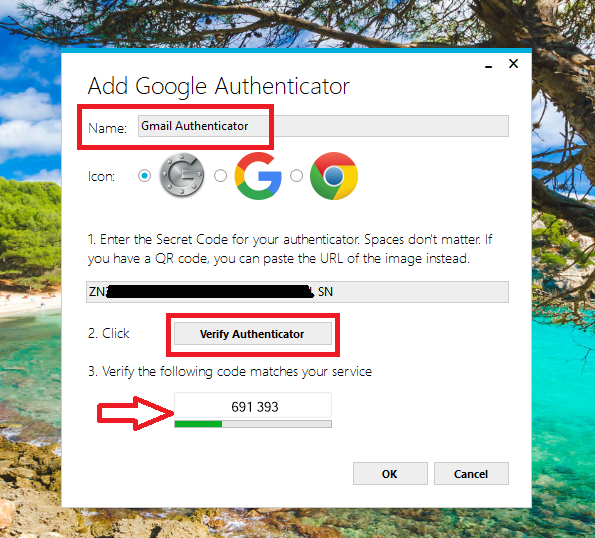
4. After hitting the Verify Authenticator option, you will see a security code on the screen. Just copy it and go to your Google Account’s settings.
5. Here, paste the security code from WinAuth in the Set up authenticator section and hit the Ok button.
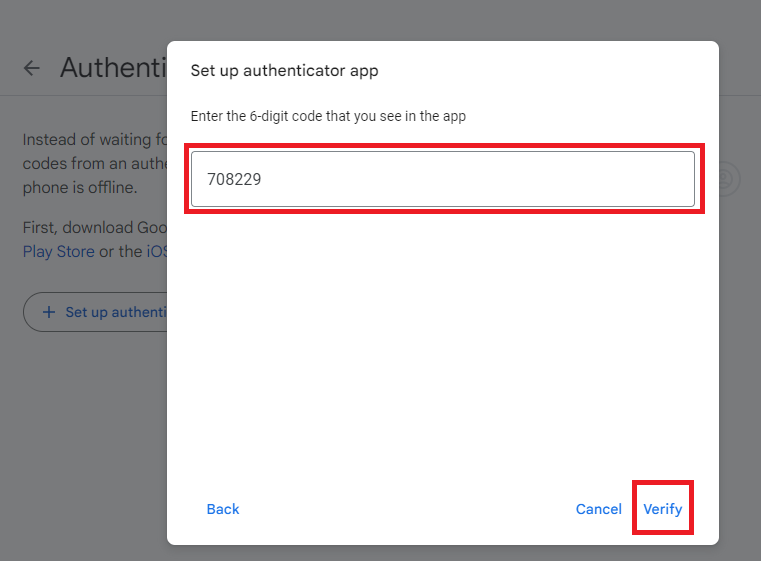
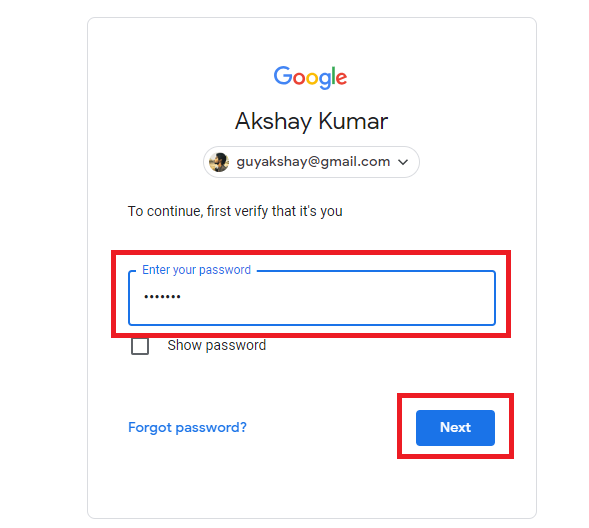
6. After you hit the Ok button, you will need to verify your account for security purposes using your current password.
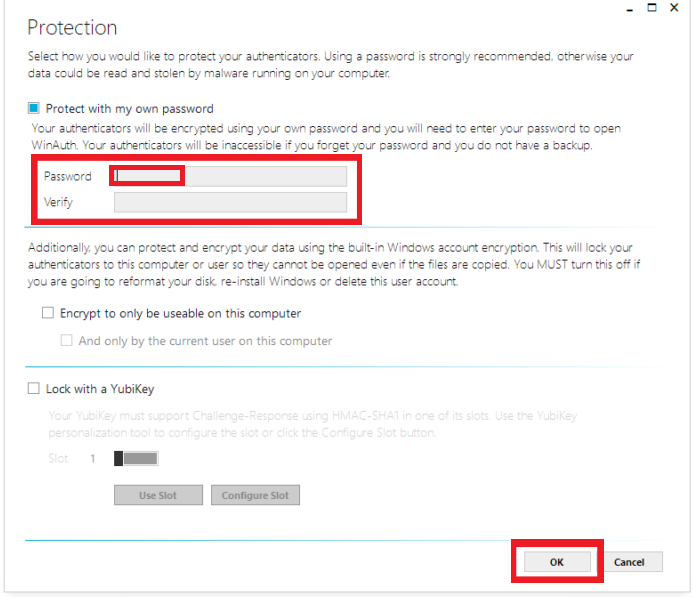
7. Now, press the Ok button in the WinAuth window and it will ask you to encrypt the system files with a password. So enter a password, verify it, and press the Ok button to complete the setup.
When you do, the WinAuth authenticator will be verified and added to your Google Account. You’ll then see WinAuth serving you up the security code for your authenticator, changing every so often in a few seconds, and you’ll be able to use that code from WinAuth whenever you need to log in to your Google Account.
2. Using WinOTP Authenticator
WinOTP Authenticator is another third party program that allows you to use Google Authenticator on Windows 11. Since this program is more focused on Microsoft and social networking website accounts and provides time based and counter based security codes, you can also use it offline. This two factor allotment program works for Google and similar other online accounts.
The program also sync all your security codes on your OneDrive account. WinOTP Authenticator is a Google Authentication program and comes free of cost. You can download this authenticator from the Microsoft Store. The application is relatively light as it’s only 28MB and supports operating systems Windows 10 or higher.
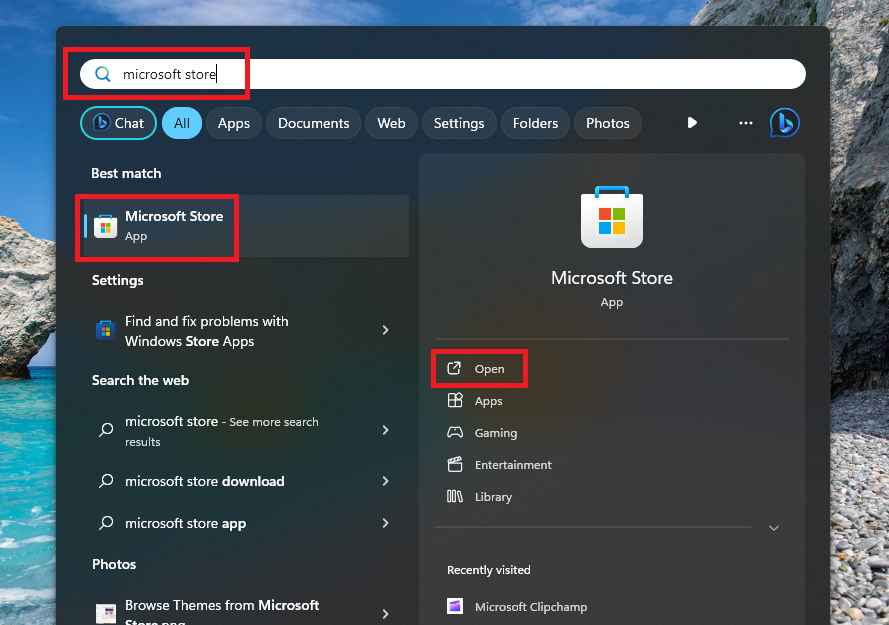
1. Hit the Windows button on your keyboard and type “Microsoft Store” in the search bar, and then open the first result.
2. Then, type “WinOTP Authenticator” in the search bar of the store and click on the first application in the search results.
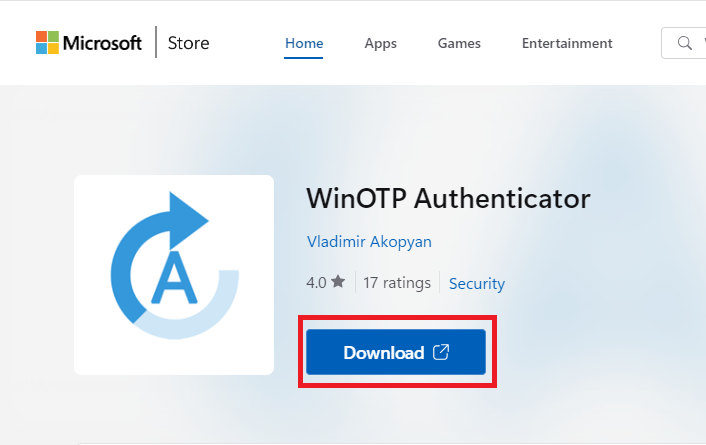
3. Now, click on the Download button on the WinOTP Authenticator’s page and let it install on your machine.
4. After the app installs, open it and click on the Plus button.
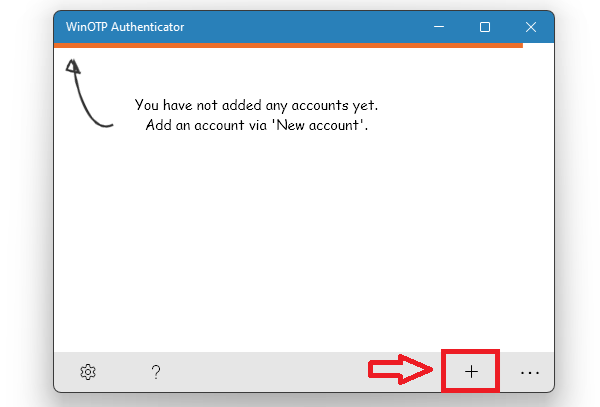
5. Now, add the name of the service and user name in the new window. In addition, also paste the secure authenticator code you acquired earlier from your Google Account’s settings.
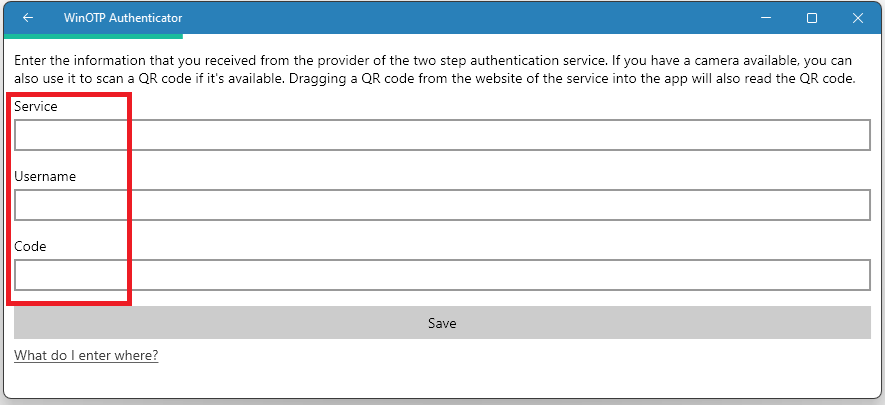
6. Then, press the Save button and you will get a six digit code. Copy the code and go to the Set up authenticator app and paste it there.
Finally, click the verify button and WinOTP Authenticator will start showing you security codes for your Google account.
3. Using Authy
There’s also a third party app called Authy which will also let you use Google Authenticator on Windows 11. The two factor authentication software is available for free on the company’s website.
It’s also able to synchronize your account security codes between your phone and Windows machine. The company also offers integrations with password managers such as LastPass.
1. Go to Authy’s website by clicking this link and then hit the download button to save the .exe file on your machine. Make sure to choose the Windows 64 bit option in the drop down menu before downloading.
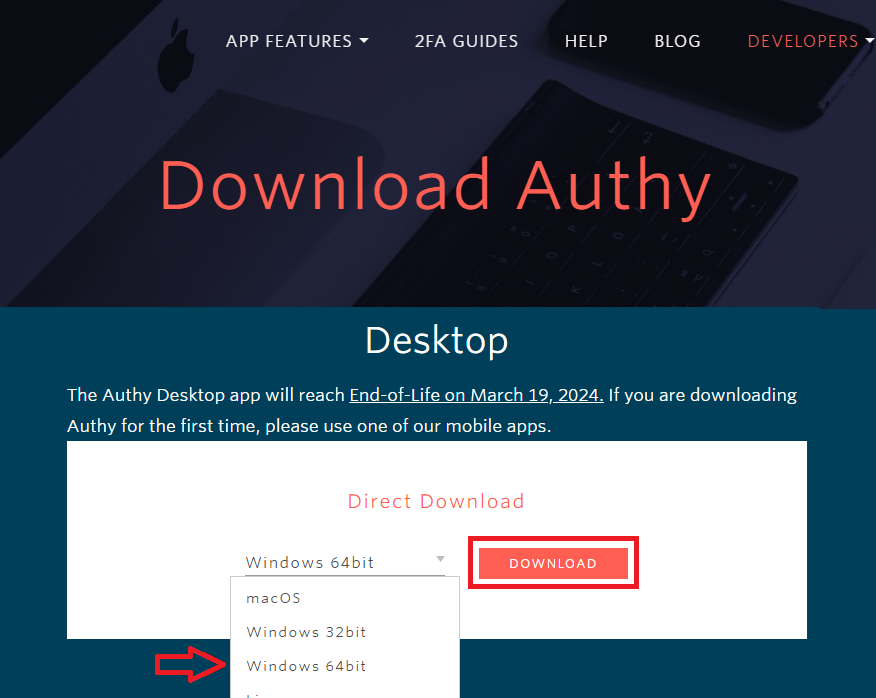
2. After downloading the .exe file, install the two factor authentication software on your Windows 11 machine and open it.
3. Now, input your account’s phone number details on the welcome screen and hit the submit button. Then, verify your account using the verification code you’ve received on your phone.
4. Then, press the Plus icon on the next screen to add an account.
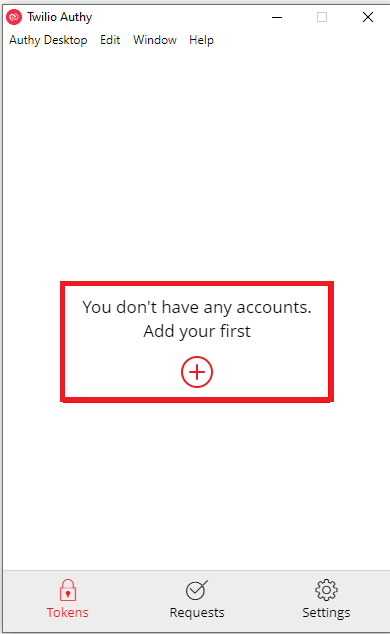
5. Now, enter the Google Authenticator code that you acquired earlier and press the Add Account button.
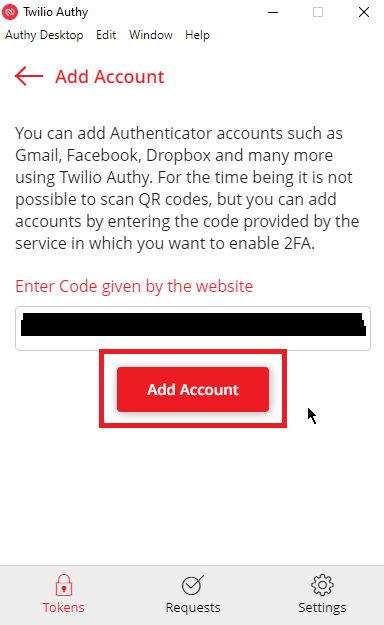
6. Then, add the account name and choose the color etc. and press the Save button.
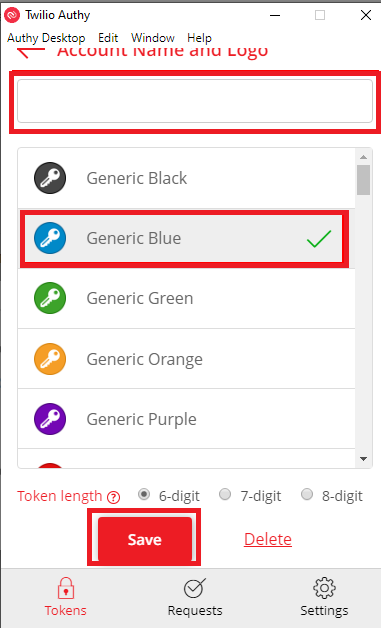
7. Now, copy the six digit code that you get from Authy and insert it in the Setup authenticator app section in your Google Account, similar to the Step 6 in the previous solution.
After verifying the code, you are all set to utilize Authy to use Google Authenticator on Windows 11.
Use Google Authenticator in Web Browsers on Windows 11
It is worth mentioning that you can also use Google Authenticator app on Windows 11 with your favorite internet browser. Mostly all popular internet browsers such as Microsoft Edge, Google Chrome, Mozilla Firefox, allow you to use authenticator app using third-party extensions or add-ons as all these browsers are chromium-based and support two factor functionality.
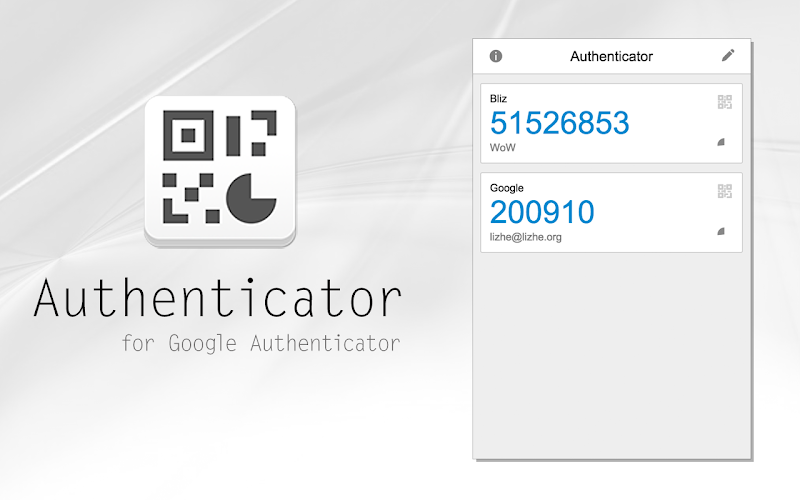
Now, if you’d like to use Google Authenticator on your browsers, you only have ro visit the add-ons store and choose any of the authenticator extensions that are available for your internet browser. Add the extension called Authenticator to your web browser and then once installed, click on the icon and follow the on screen instruction just like above option that we provided to third party apps for Windows 11 users.
Final Words
As stated earlier, millions of people utilize Google’s two factor authentication utility — the Authenticator — however, it’s officially only available on smartphones and thus, the vast majority of Authenticator users are Mobile-based to begin with. Still, for those that would lean towards further securing their Windows 11 PC accounts, the above will serve as a guideline.
Deploying the two factor authentication (2FA) — which is what it’s more often referred to as — is sure to markedly increase the online security of your Windows 11 PC accounts. Even so, it’s worth mentioning that all the applications/extensions detailed above are heavily secure with high user ratings, plus also, provided you’re solely using Google’s own official two factor authentication application within Windows 11, then like its erstwhile Windows iterations that also allows for a Google Authenticator installation, it should be noted that you should be safe from any unauthorized access. So, be sure — as one always should, but especially in this case — that you are also using highly rated secure 3rd party programs for use of Google Authenticator on Windows 11, which are what — even more than most of today’s software — one would not want to make a mistake with and lose his/her private data from.


