Having written so many guides for Macs, I can boldly say I am an expert. Nevertheless, meeting for a very important video conference and finding out my microphone is not working on my Mac can be frustrating. If you are here, I am sure you are experiencing this mic problem on your Mac.
Not to worry. In this guide, you will have all you need to know about this problem, and I will show you how to fix the mic not working on a Mac issue. So let us get busy without further talk.
Fix Microphone Not Working on the Mac
Now you must think, “Why is my microphone not working on my Mac?” I wish there were a simple reply to this question – many factors may lead to such problems. Nevertheless, I assure you it is a common issue and can be resolved appropriately.
Your system settings are not set correctly; sound might be inputting into the wrong device, or various applications do not have access to your microphone – all these cause your microphone to be inoperable. Plus, some bugs in macOS might also lead to microphone problems.
As already mentioned earlier, there might be a plethora of issues. Yet, you should not worry! In this guide, I will go over the essentials and show you how to fix the microphone problem on your Mac. Therefore, water your horses and let’s solve this issue!
1. Ensure that the issue is not specific to an App
Some Mac users often use their microphones, whether in meetings, calling via FaceTime, commanding Siri, or recording voice memos. They might have a high possibility of noticing quickly if the microphone actually stopped working, as that would disrupt their regular daily routine.
However, some Mac users rarely use their microphone unless it is needed. Either way, first ensure that the issue is fixed and that the mic is not working, isolated to a specific application.
For instance, when you are using an app such as Zoom and Microsoft Teams, and you realize that the microphone is not responding, you may open an alternative app of Voice Memos or even converse with Siri from your screen’s top right corner. This process helps ensure you know whether the mic not working error only responds with a specific app or affects your Mac’s apps.
If you assess that there are no issues with your alternative apps, it indicates that the Mac model mic is not working and only targets that specific app. Then, you can adjust those apps to resolve the error.
2. Allow Microphone Permission for Required Apps
If you have done all the above and understand that the microphone works perfectly during FaceTime calls or when accessing Siri on your Mac, I would only recommend that if the Microphone is dysfunctional on some Apps, you take a step back and adjust the permissions.
Every time you download an app that requires a Mac’s microphone, such as screen recording apps, sound recording apps, and video conferencing apps, to mention a few, it will ask for microphone permissions the first time you launch it. If you have probably dashed into terms or denied the prompt, the microphone will not function in that compatible app until a manual setup is performed.
At this juncture, remember this does not affect the microphone permissions in apps such as FaceTime and Voice Memos. But just for you, you need to open the microphone functionality for all apps you deem possible because you never know if and when you will require the microphone in those apps.
1. On your Mac, click the Apple icon at the top left corner of your screen.
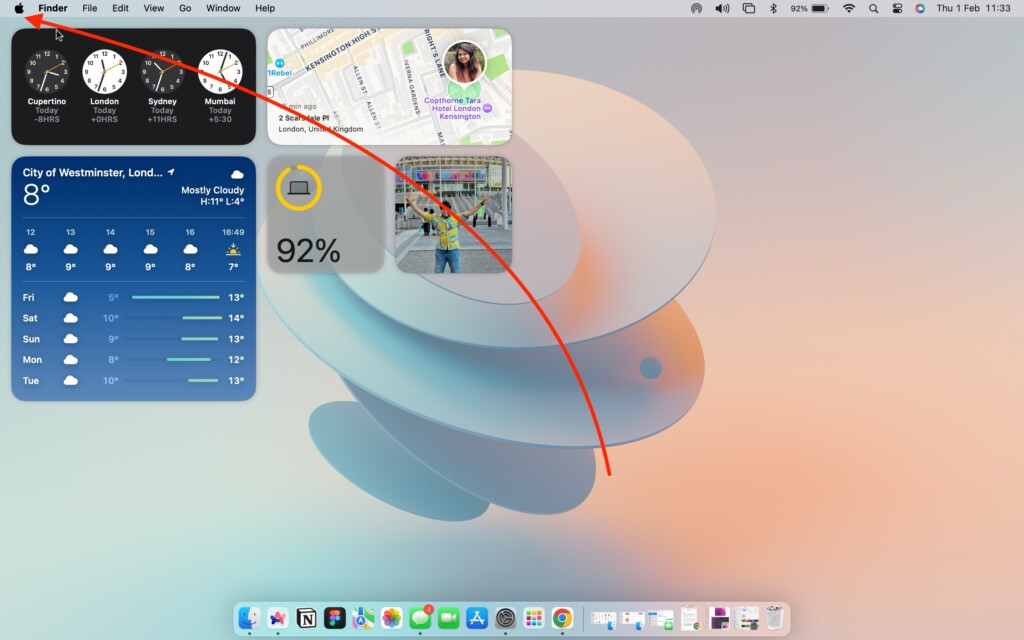
2. From here, click and open the System Settings.
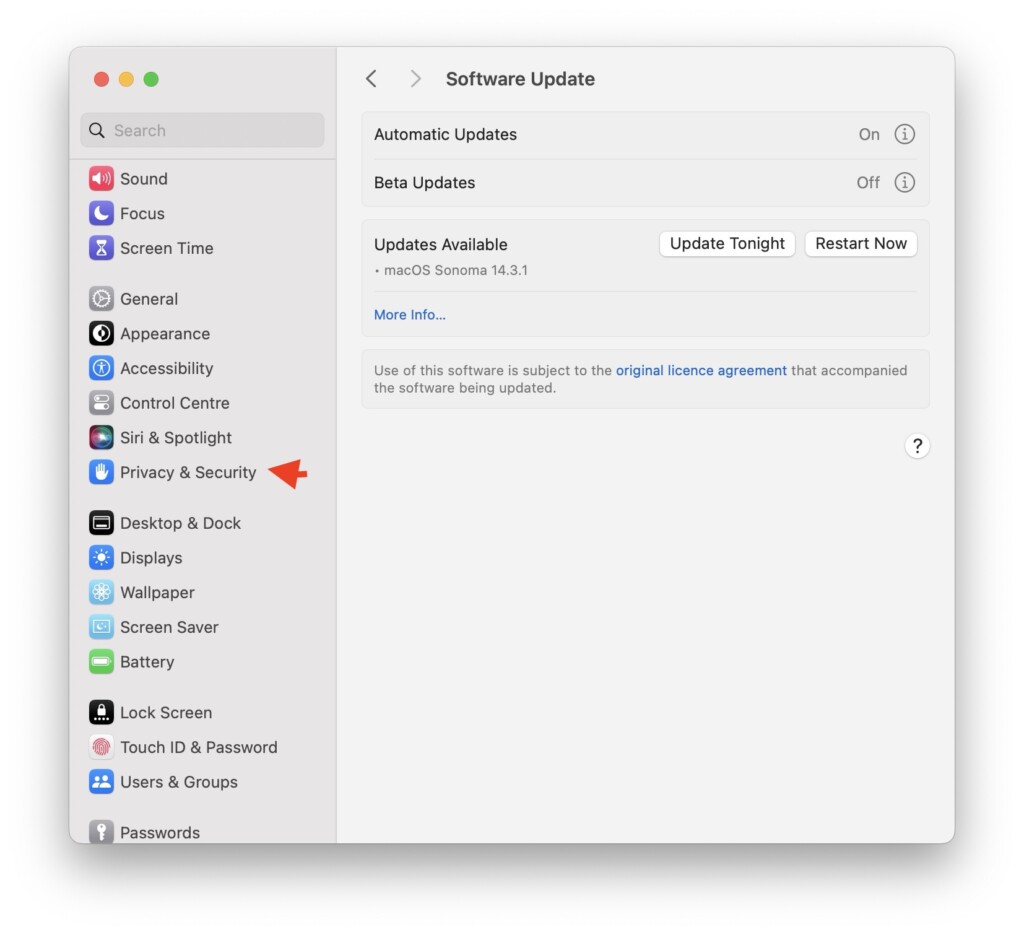
3. Once the System Settings app is open, scroll down a little and click on the Privacy & Security settings.
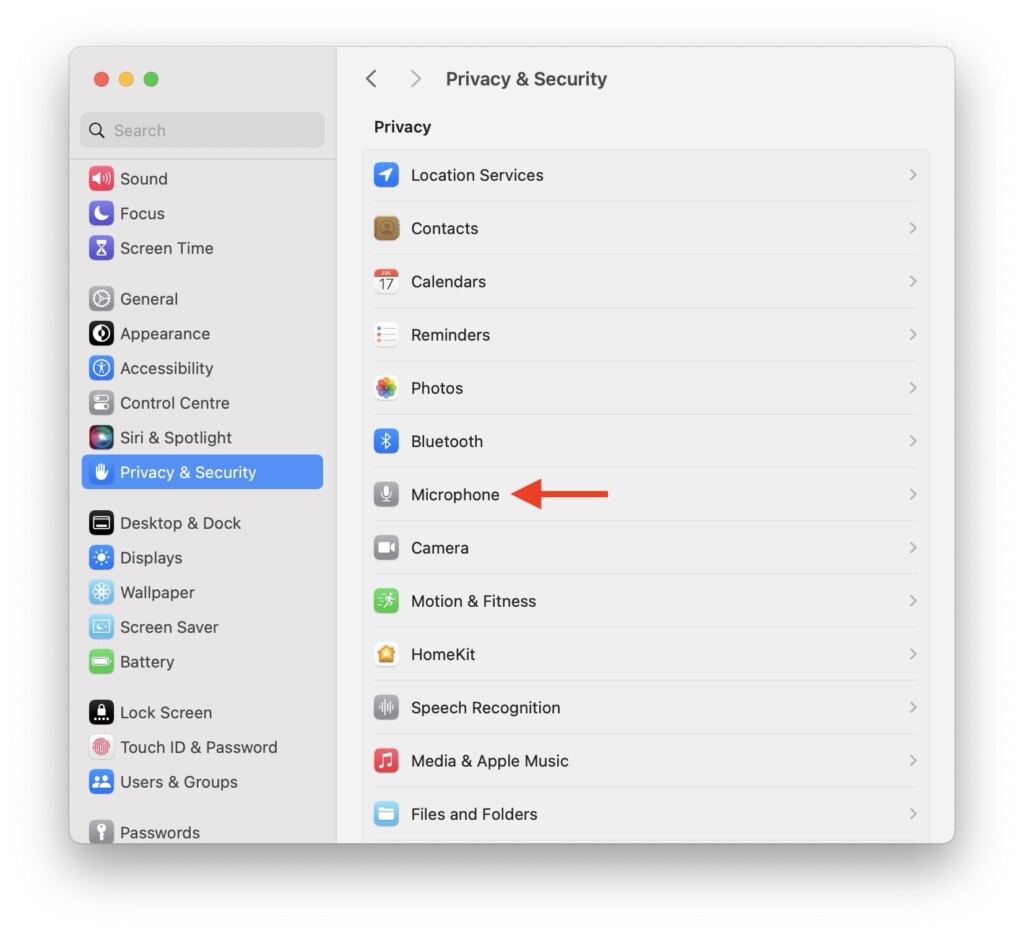
4. Next up, click and open the Microphone settings.
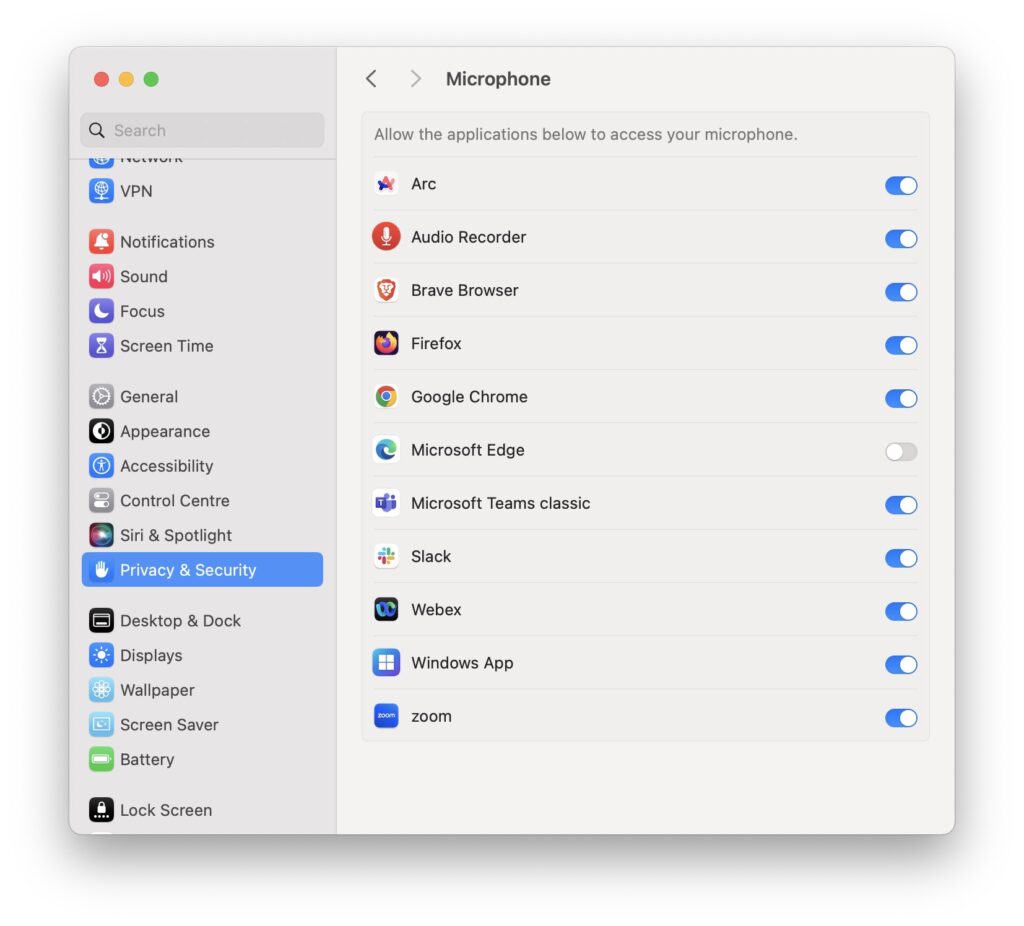
5. From here, turn on the toggles for all the apps that require microphone access including browsers, video and audio calling apps, recording apps, etc.
3. Enable Microphone from Site Settings
If your microphone is perfectly working in all apps on your Mac but not working in the web browser you are in, then this method is for you. You might be more interested in conducting your meetings in browsers rather than downloading the respective app. If your browser’s microphone is, and you prefer, meeting via the browser, it is vital that you check if you have enabled the microphone permission of the specific website you are on.
You might think you had given permission to the browser’s microphone on the macOS system, yet it is not working, say a Google meeting session. Yes, each browser, be it Google Chrome, Safari, Firefox, or others, has its own unique settings and controls per website. Some websites would like to know your location, while some will ask for permission from a camera or microphone and your privacy; it is your duty to allow or block whichever you feel is better.
Just like in macOS, with the browsers, the website will ask you to allow permissions such as camera and microphone for the first time. Enable or allow each; they will be open whenever you visit the websites.
1. On your Mac, open the preferred browser app and navigate to the website where you intend to use the microphone.
2. Once the website is loaded, click the Site Settings icon. On some websites like Microsoft Teams, you must join the meeting first and open site settings.
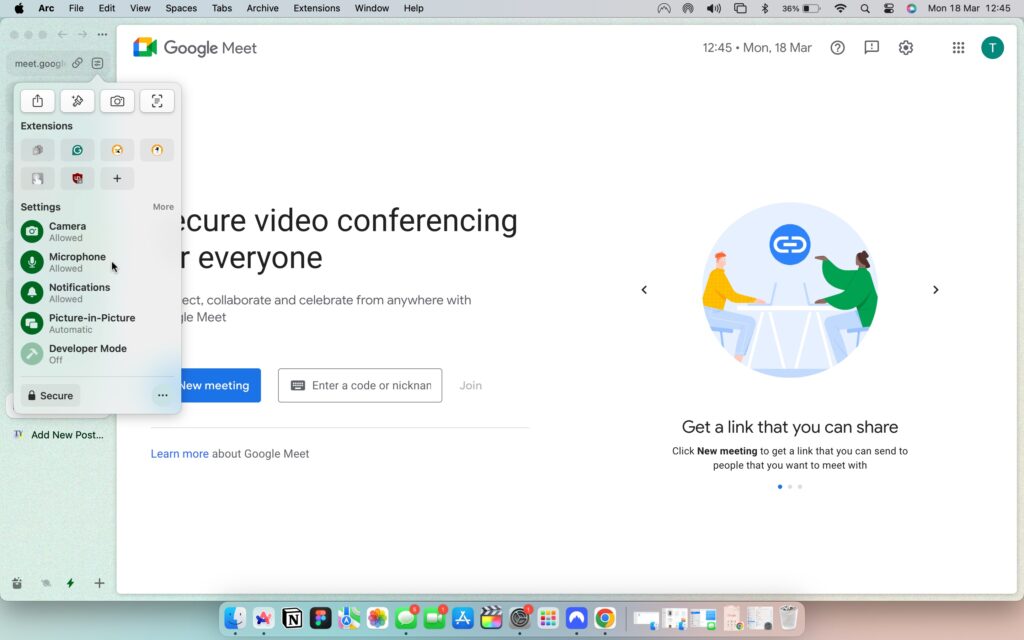
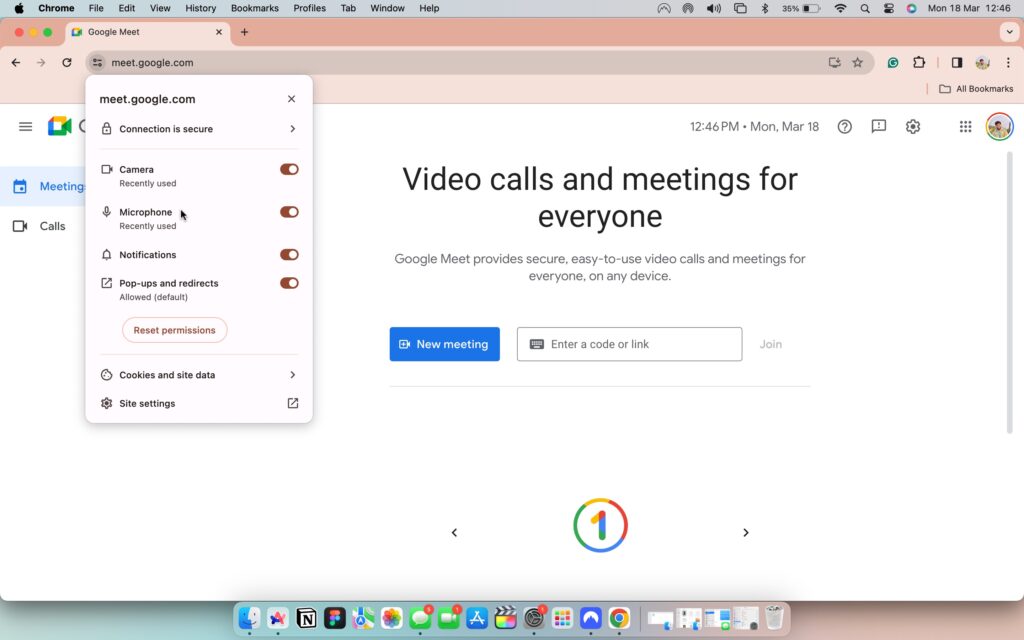
3. From here, enable the permission for Microphone.
4. Restart your Mac
Turn your Mac off and turn it back on again. Yes, it’s finally time to try the classic IT support method if your microphone isn’t working in any apps on your Mac. Since I’ve used MacBooks extensively throughout my career, I’ve encountered random issues like this on many occasions before. And one of the first corrective methods I always use in these situations is restarting my MacBook.
Surprisingly, a restart often automatically resolves many issues on Mac. Even though the issue of the microphone not working might seem serious, community posts indicate that many Mac users frequently fix this issue by simply restarting their devices.
A single restart might undo your Mac’s countless settings. When you restart your Mac, all background tasks are shut down, and any system bugs or issues that caused the mic not to work might be resolved.
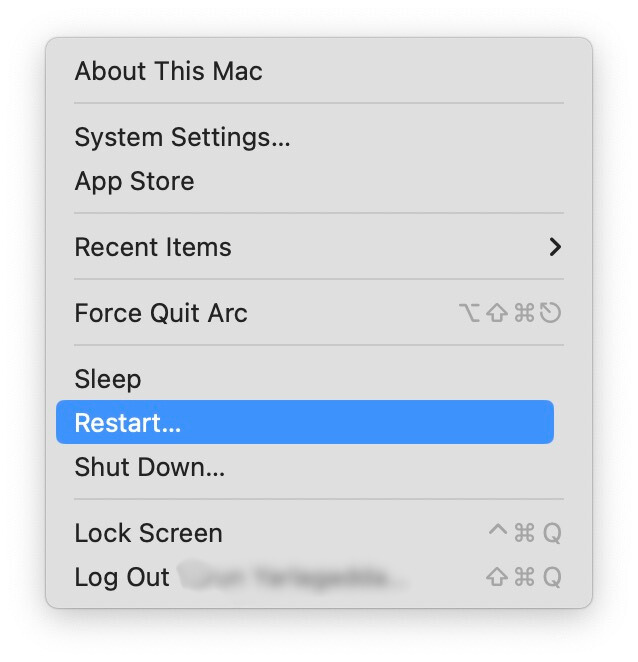
1. On your Mac, click the Apple icon in your screen’s top-left corner.

2. Click on Restart, between the Sleep and Shut Down options.

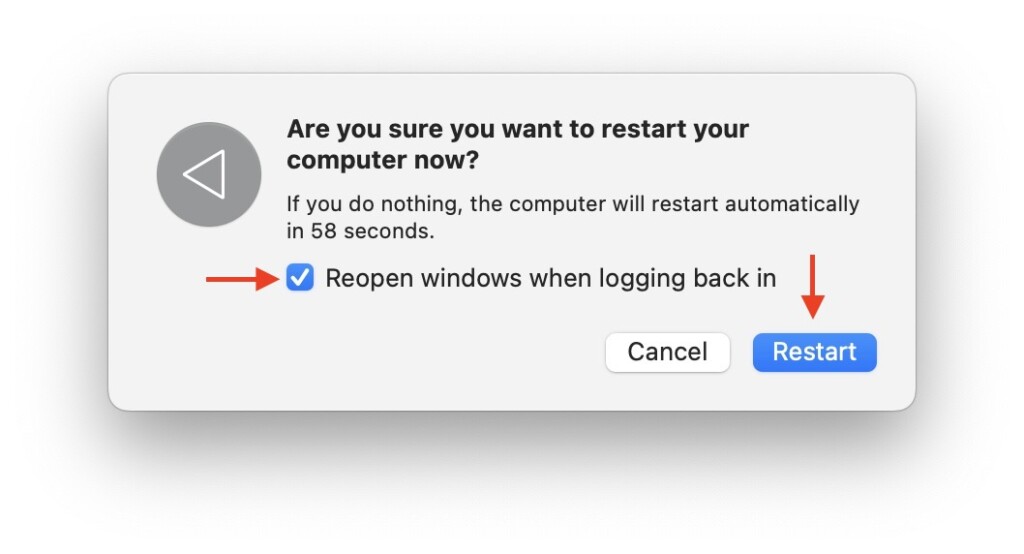
3. Now, click the checkbox beside Reopen Windows when logging back in and then click the Restart button.
5. Reset NVRAM
NVRAM, which stands for Non-Volatile Random-Access Memory, is a small part of your Mac’s memory used to store specific, quickly accessible settings. When settings associated with the NVRAM become corrupted or raise problems, they affect the Mac.
If you have any problems with the settings controlled by the NVRAM, reset it. Do so for any Intel-based MacBook note. For Silicon MacBooks, you do not need to reset the NVRAM manually. When you restart the computer, it clears itself and sets the settings back up.
Resetting the NVRAM on an Intel-based MacBook can resolve the issue by discarding potentially contaminated or conflicting settings. Most of the time, your Mac’s behaviour is related to how settings act unreasonably or the microphone does not work.
1. On your Mac, click on the Apple icon in your screen’s top-left corner.

2. From here, click on the Shut Down option.

3. Once your Mac is turned off, press the power button to turn on your device. Now, quickly hold down the Option ⌥ + Command ⌘ + P + R keys simultaneously for up to 15 seconds.
4. After 15 seconds, your Mac will restart automatically. When you hear the Start Up sound, release the keys. If your MacBook does not have a start-up sound, release the keys after you see the Apple Logo for a second time.
Wrapping Up
This brings us to the end of our guide on how to fix the microphone issue on a Mac. I believe most of the troubleshooting solutions shared should have helped fix the microphone issues on your Mac device. In case none of the above systems worked to solve your problem, please contact Apple Support. The issue might be physically related.
or those that were able to fix the microphone not working on the Mac issue, good job and keep it up. Before leaving, please share it with friends who might need it during such instances.
As I bid you adieu, thank you for choosing TechnosPulse as your troubleshooting guide. We are committed to providing you with tech guides like this, so if you face any issues with any of your devices, check our website for relevant guides. Until next time, stay techy!


