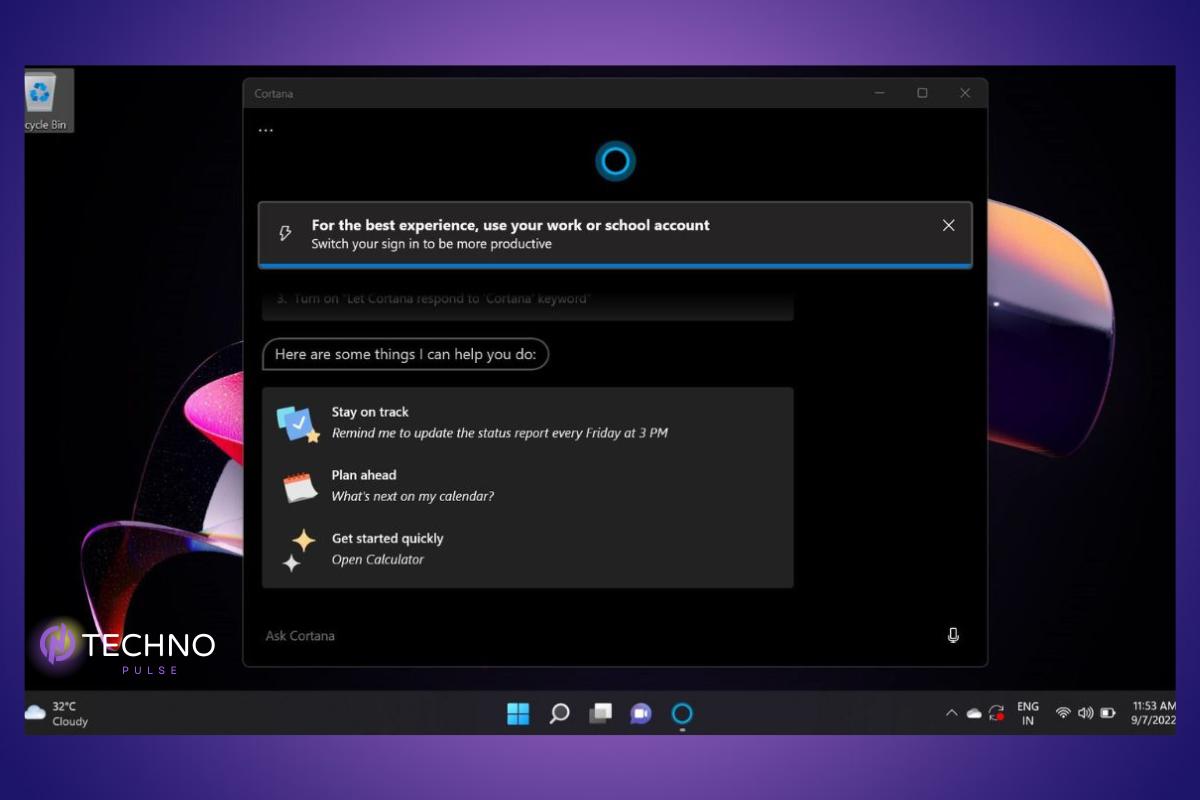
As a Windows PC user, you must be aware of Cortana. Cortana is Microsoft’s digital voice assistant, which lets you get things done using voice commands, just like Google Assistant on Android smartphones or Siri on iPhones. If you prefer not to use Cortana, you can Disable or Uninstall Cortana in Windows 11. However, it is not nearly as smart or capable as the two I mentioned.
If you are looking to enhance your music experience on Windows 11, you may also be interested in learning How to Install and Use iTunes on Windows 11.
It is wrong most of the time or can not respond simply to your queries, which is why people do not like it. The app itself is rated under 2 stars out of 5 on Microsoft Store1—pretty alarming, right? But good news for you if you want to get rid of it: You can disable or uninstall it from your Windows 11 PC.
Disable or Uninstall Cortana in Windows 11
First of all, we must say that Cortana is not standard and enabled by default on Windows 11. You don’t find the digital assistant in the first boot experience, and it is not pinned to the taskbar by WattMade, so it won’t start annoying you the second you set up your PC. However, Cortana is still somehow on Windows, and here is how you can remove it.
Uninstall Cortana in Windows 11
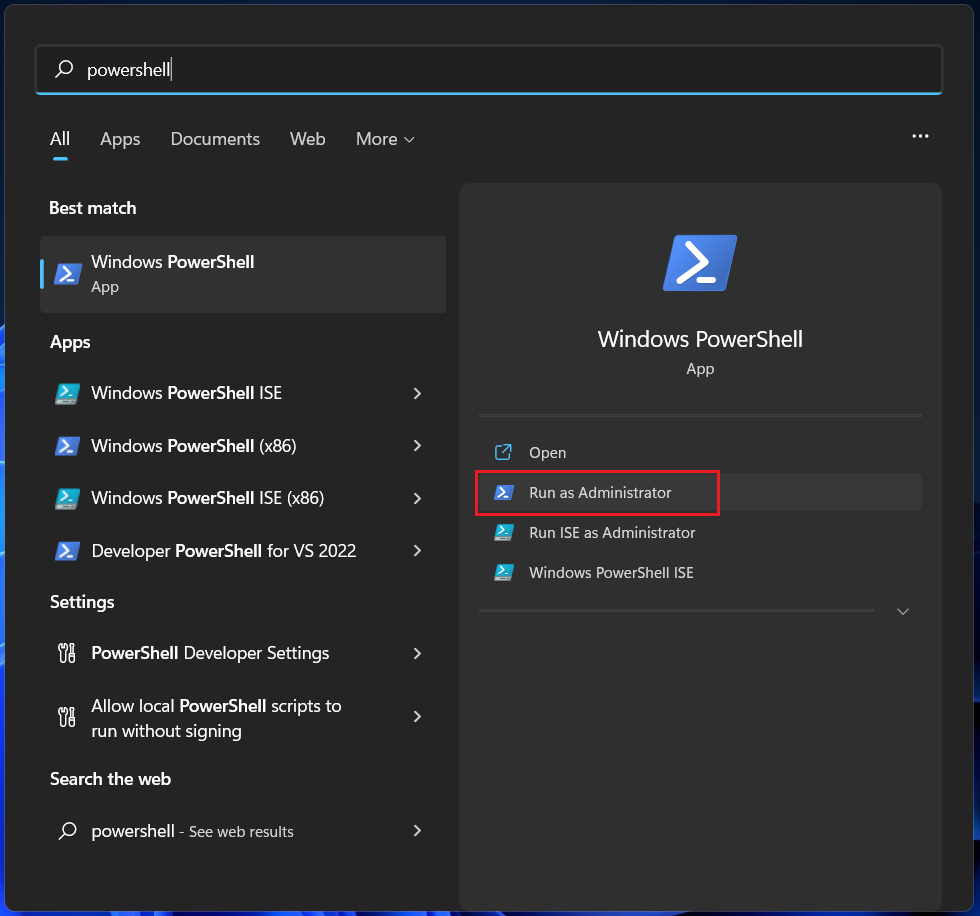
To uninstall Cortana in a Windows 11 PC, you must launch Windows PowerShell with administrative privilege following the steps below.
1. Type PowerShell in the Windows search bar and select the Run as administrator option.
2. Copy and paste the following command on the prompt box and press Enter.
“Get-AppxPackage -allusers Microsoft.549981C3F5F10 | Remove-AppxPackage”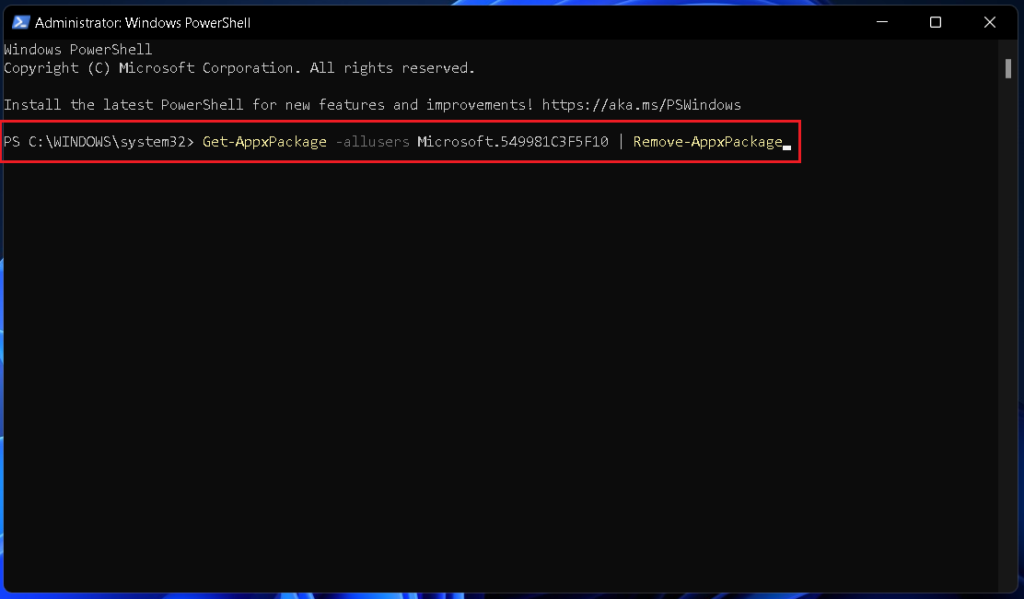
3. You can replace the above command with the following one to specifically uninstall Cortana from your currently logged-in user account.
“Get-AppxPackage Microsoft.549981C3F5F10 | Remove-AppxPackage”That’s about it. Cortana is now gone from your computer. Should you ever need it again, you can always install the app from the Microsoft Store by following this link.
Disable Cortana in Windows 11
You also have the option to disable Cortana on your Windows 11 PC instead of uninstalling it so you can quickly enable it whenever needed. There are a few ways to do that. Below are some of the most common and easiest methods.
Using Task Manager
The task manager lets you easily disable Cortana so it doesn’t automatically launch in the background when your Windows 11 PC boots. To do this, follow the steps below.
1. Launch the Task Manager by using the keyboard shortcut Ctrl+Shift+Esc.
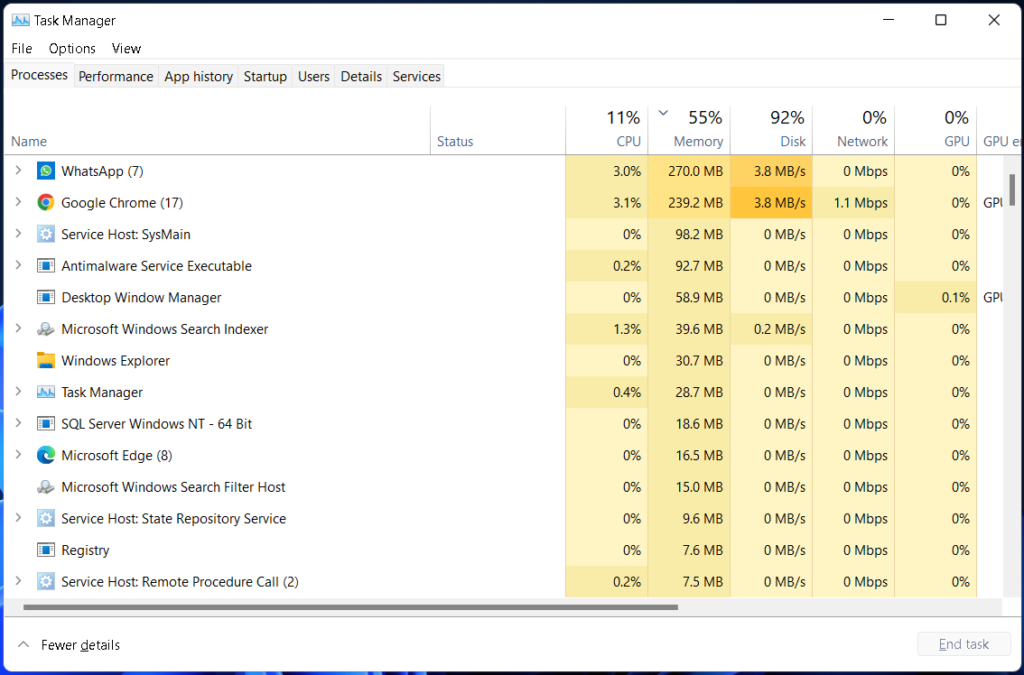
2. When the Task Manager opens, go to the Startup tab. You will see a list of apps and services automatically launching when your PC starts.
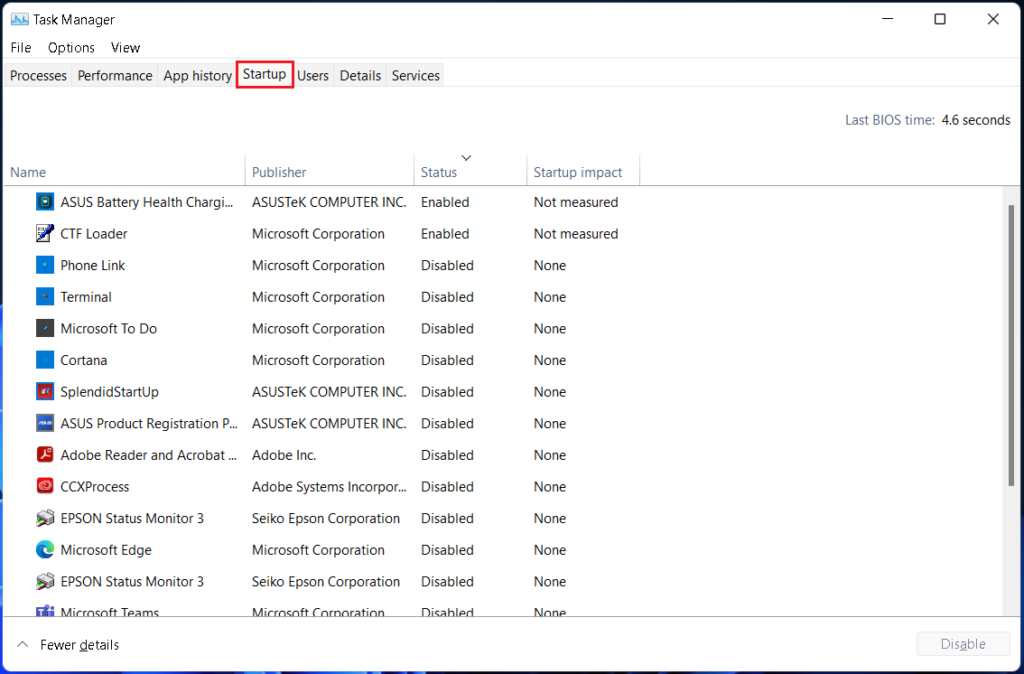
3. Locate and select Cortana on the list and click the Disable button at the bottom right corner of the Window.

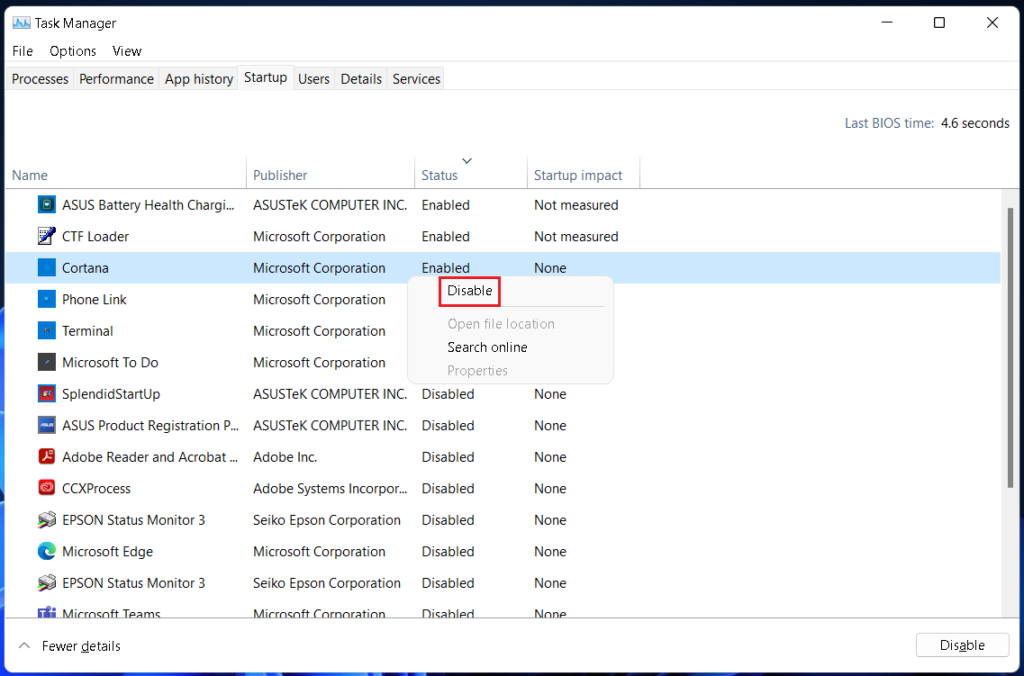
4. You can also right-click on Cortana on the list and select the Disable button.
From Windows 11 Settings
Cortana can also be disabled from the Settings app on a Windows 11 PC. This method is fairly straightforward as well, without any complications. Check out the steps below.
1. Launch the Windows 11 Settings app using the keyboard shortcut Windows key+I.
2. In Settings, go to the Apps section and select Apps & features.
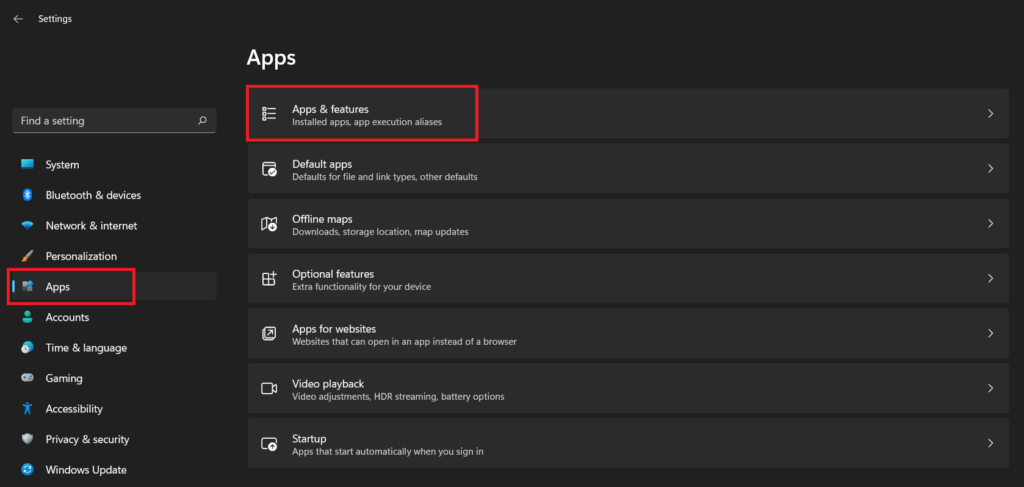
3. Scroll down to find Cortana on the app list or simply search for it in the search box.
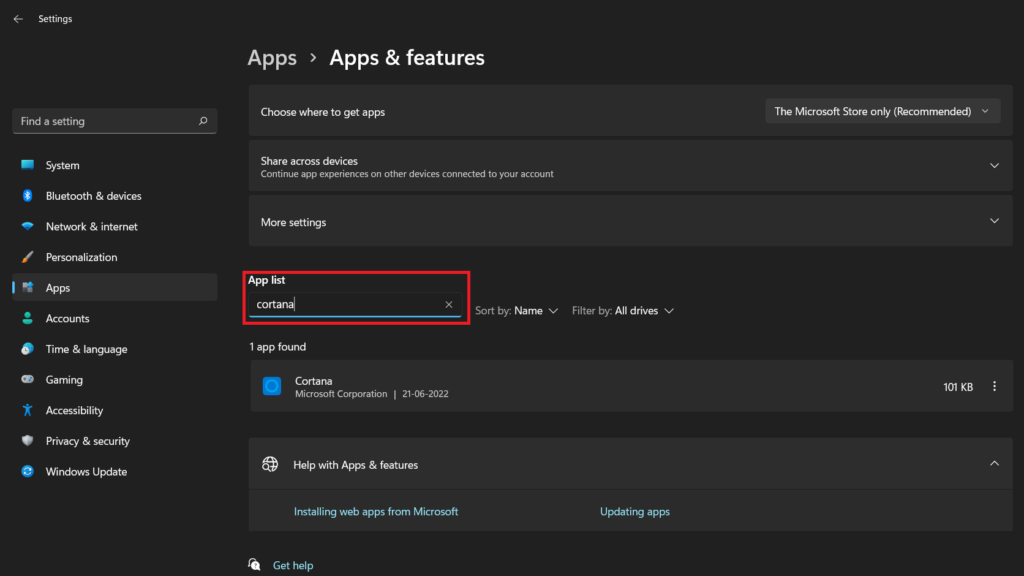
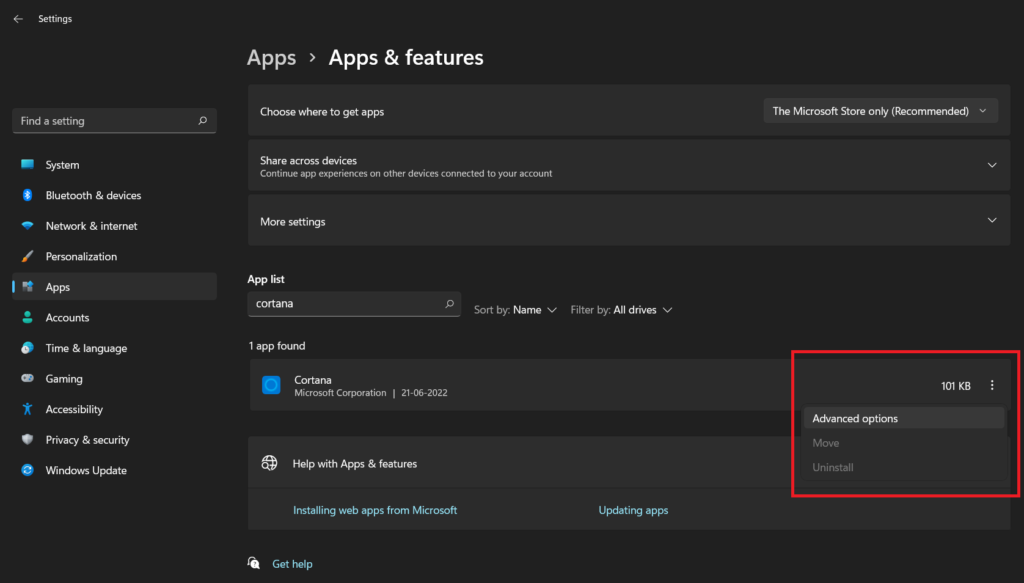
4. Once you have located Cortana, click on the vertical three-dot menu towards the right end of the listing and select Advanced options.
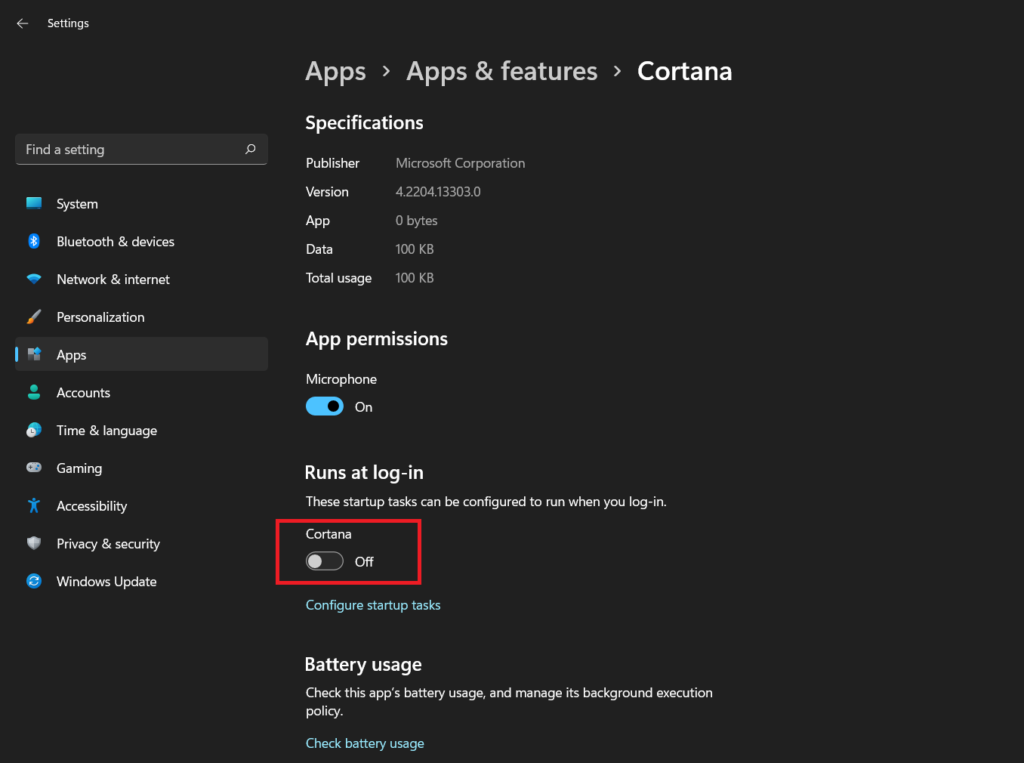
5. Turn the Cortana toggle Off under the Runs at log-in section.
From Group Policy Editor
Group Policy Editor is another method of disabling Cortana on Windows 11. This method is a little complex but not much. It gets the job done effectively if you carefully follow the steps below.
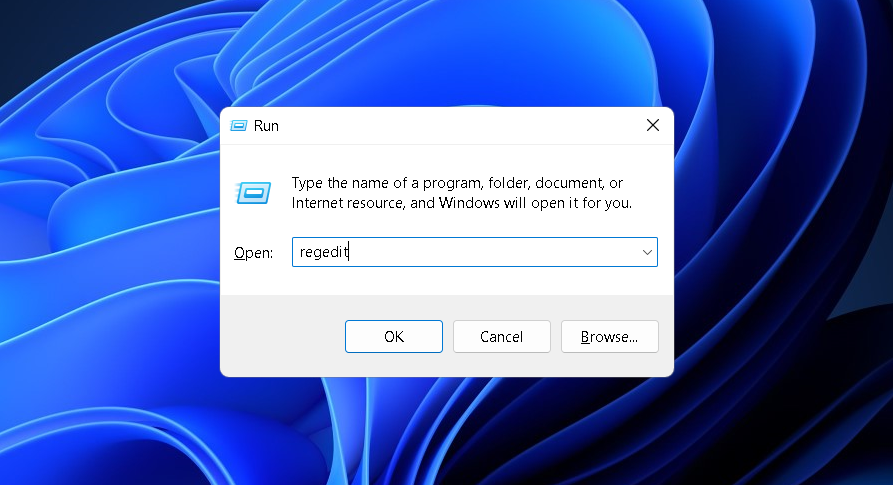
1. Press the Windows key and R simultaneously to open the Run window. Type regedit and then press Enter.
2. Once the registry editor opens, locate the HKEY_LOCAL_MACHINE folder under Computer and navigate to the following path:
HKEY_LOCAL_MACHINE>SOFTWARE>Policies>Microsoft>Windows>Windows Search. 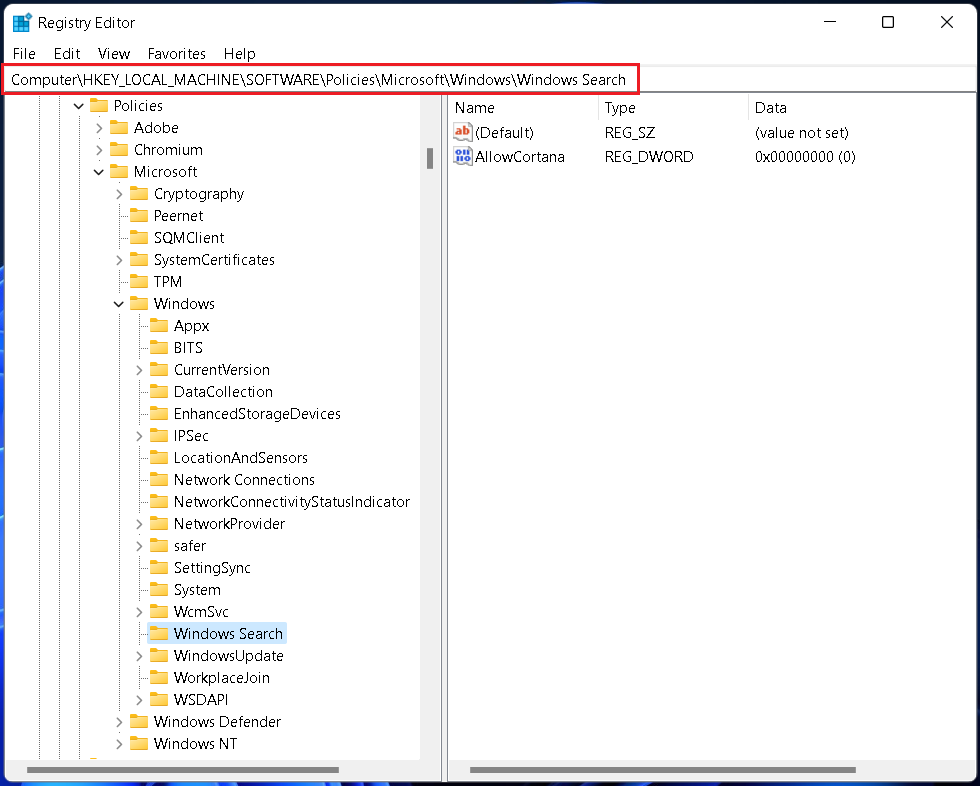
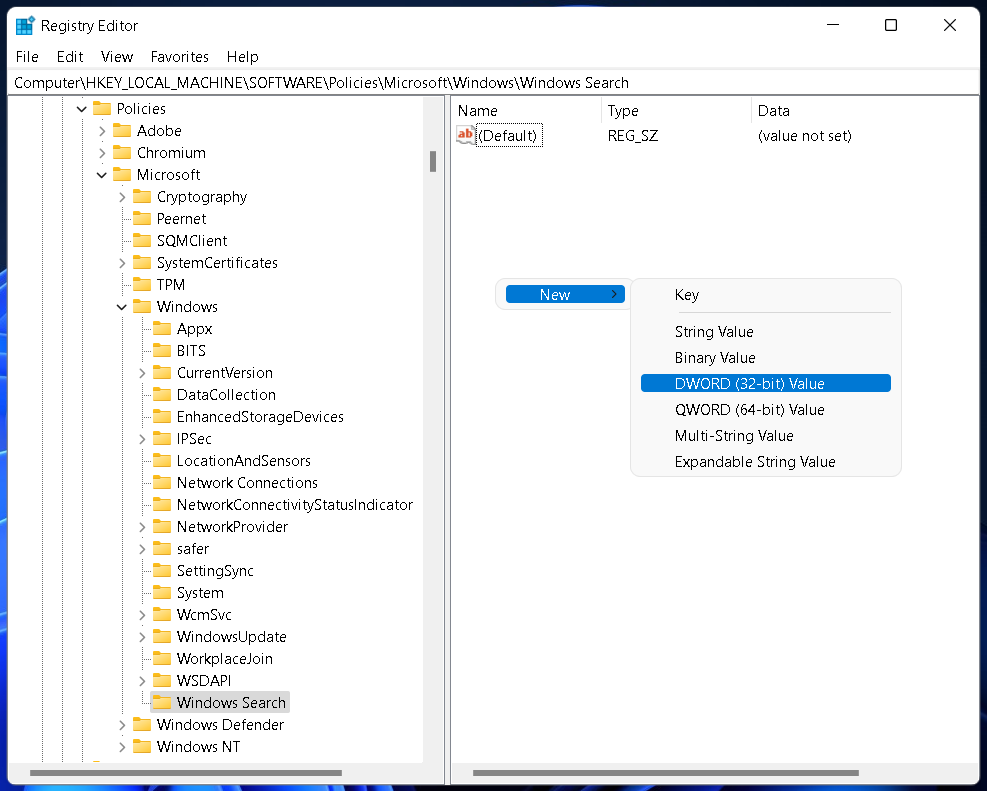
4. Click on Windows Search, right-click anywhere on the right pane, and select New > DWORD (32-bit) Value.
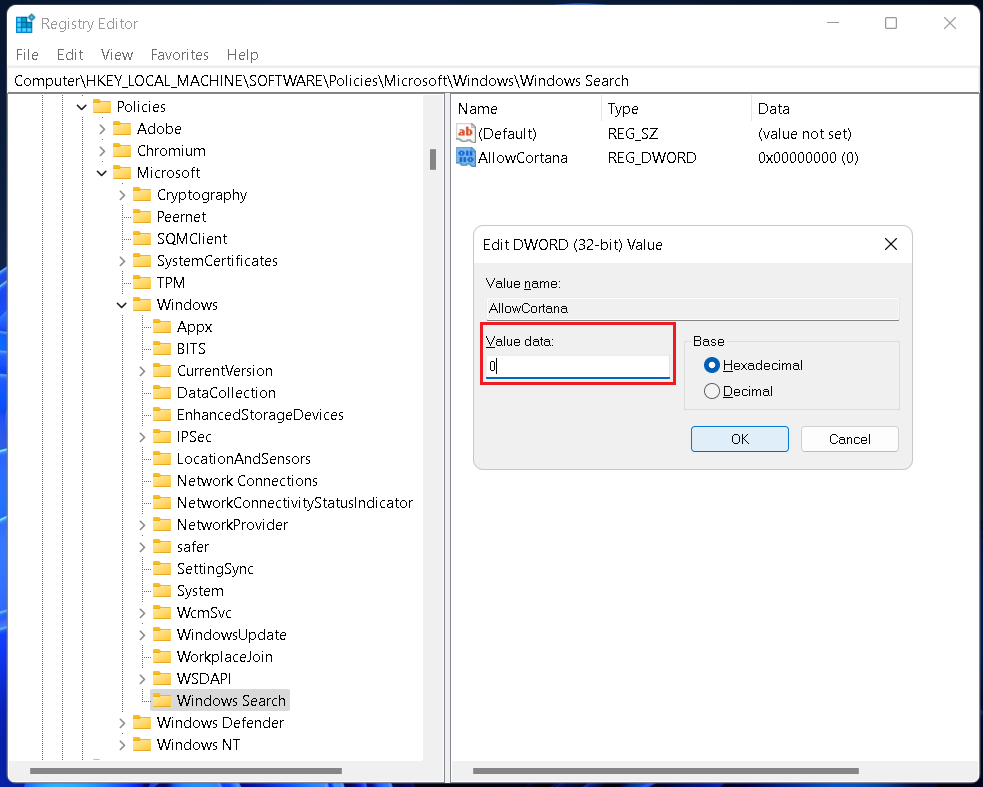
5. Name the entry as AllowCortana, double-click on it to set the Value data 0, and click OK.
6. Restart your computer.
Cortana is now disabled on your Windows 11 PC. If you try to open the app, you should see the following message: Cortana is disabled. To use Cortana you need to get permission from your administrator.
Re-enable Cortana in Windows 11
If you need to re-enable Cortana for some reason, you can use any of the above three methods. In Task Manager, you will see an Enable button at the bottom right corner of the Window when you select Cortana under the Startup tab. In Windows 11 Settings, turn the Cortana toggle On under the Runs at log-in section. Finally, when using the Group Policy Editor method, set the Value data of AllowCortana as 1.
If there is a reason you require to enable Cortana, you can use any of the three methods discussed above. For instance, after selecting Cortana in Task Manager and the Startup tab, there will be an Enable button placed there at the bottom right of the Window. When you go to Windows 11 Settings, you have to turn the Cortana toggle On under the Runs at log-in section. When you use the Group Policy Editor method, set the Value data of AllowCortana as 1.
FAQs
Can you uninstall Cortana on Windows?
Yes, Cortana can be uninstalled on Windows. Multiple ways make that possible. The essay gives a small lesson on how to get rid of Cortana in two ways – the simplest and the most widespread.
Why does Cortana keep popping up in Windows 11?
The explanation is simple: You can actively enable it and listen to voice commands. If you can live without it, you can easily turn it off.
Can I stop Cortana from running?
Of course, you can. In this essay, you will learn how to disable it, but it is always practical to uninstall it completely.


