Microsoft also preloads its Windows desktop operating system with more than a few additional apps and services. Even though you follow the default clean installation procedure of Windows 11, it’ll contain numerous unwanted programs and services like the above that you may never use. These programs may run automatically in the background, consuming reliable resources or slowing your PC.
Some apps are Xbox, Microsoft Teams, Spotify, Grammarly, Luminar Photo Editor, and regular apps like Outlook and Microsoft Clipchamp. So, you might not even need these applications and software programs. Note: A few programs can’t be uninstalled this way.
A term for their removal is “debloating.” With this, you can remove programs that won’t get uninstalled. So, in that guide on how to debloat Windows 11, we are going to take steps and show you different ways to remove such annoying apps or programs.
Things to Do Before Debloating Windows 11
Here’s a list of things to consider before you continue with the debloat process indexPath: This step also comes bundled with a smaller check: install the most recent version of Windows 11 and set up system recovery.
These will help you restore your system to a working state if something goes wrong. Debloating or removing a vital Windows service can cause that aspect of the system to become unstable and/or unusable.
1. Install the Latest Windows 11 Updates
Before starting the debloating process, ensure you have updated your Windows 11 PC to the latest version. To do so: Microsoft ships new Windows 11 updates consistently with the most recent features and applications.
So, these apps or services may reappear on your PC with the new updates. Firstly, update your PC; all these apps can’t access it, so get rid of them in one go!
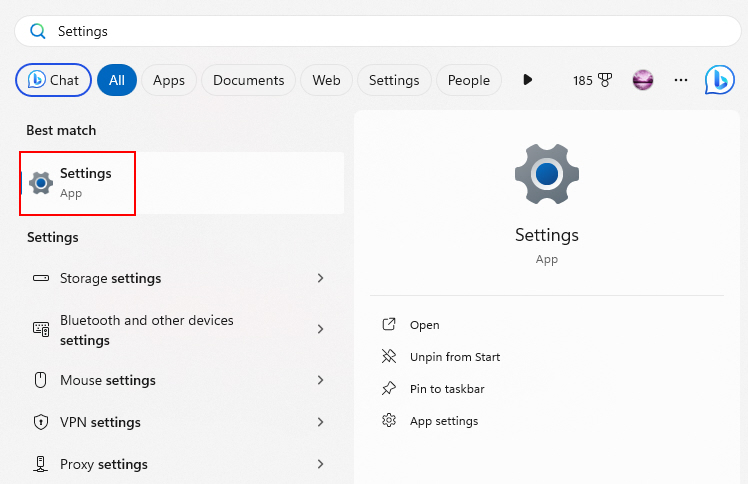
1. First of all, press the Windows button on your keyboard, type “Settings” in the search bar, and open it.
2. Now, click on the Windows Update tab at the bottom of the left navigation pane.
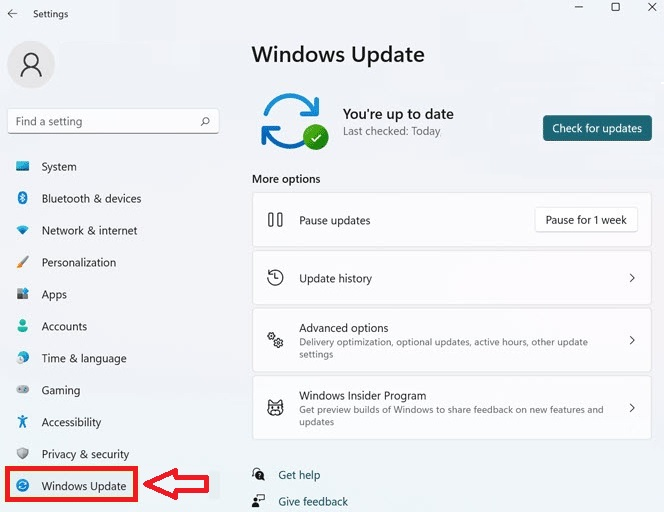
3. Press the Check for updates button on the right side of the screen.
4. Now, Windows will start looking for newer updates. If it finds any updates, they will be located below the Check for Updates button.
Once the search process is complete, install all the new updates and restart your PC to boot with the latest version of the OS.
2. Create a System Restore Point
Importantly, as always, you should create a System Restore point before debloating your Windows 11 machine. So, if something goes wrong or you mess up your system configuration mode and are unable to access the terminal, don’t worry about that because we can revert back to a working, safe system. How to Create System Restore Point on Windows 11.
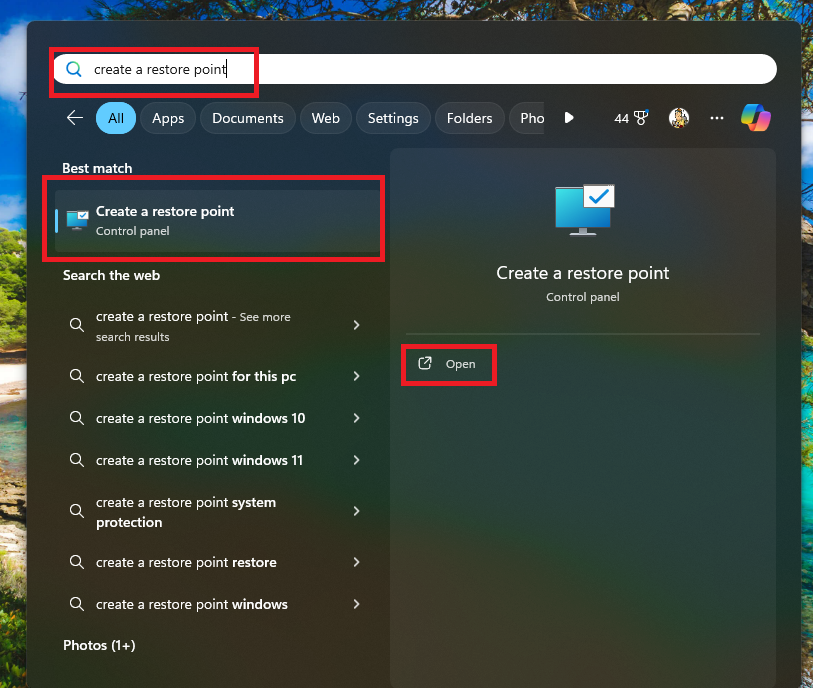
1. Press the Windows button, type “Create a restore point,” and select the best-matched result.
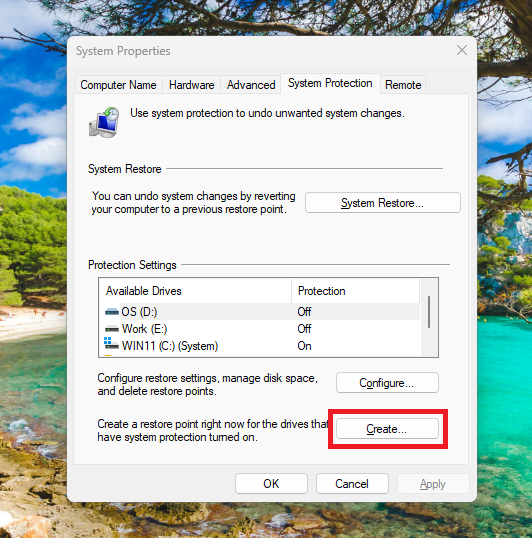
2. This will open the System Properties window. In this window, click the Create button at the bottom.
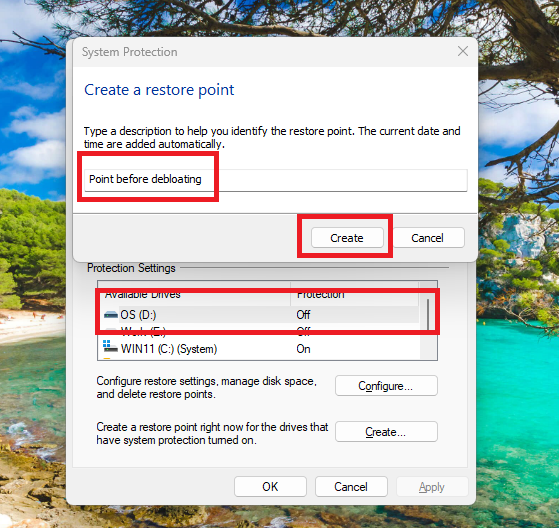
3. Select the drive where your operating system is installed and click the Configure button. Then, choose a name for your restore point and press the Create button.
4. Windows 11 will start creating a restore point for your PC.
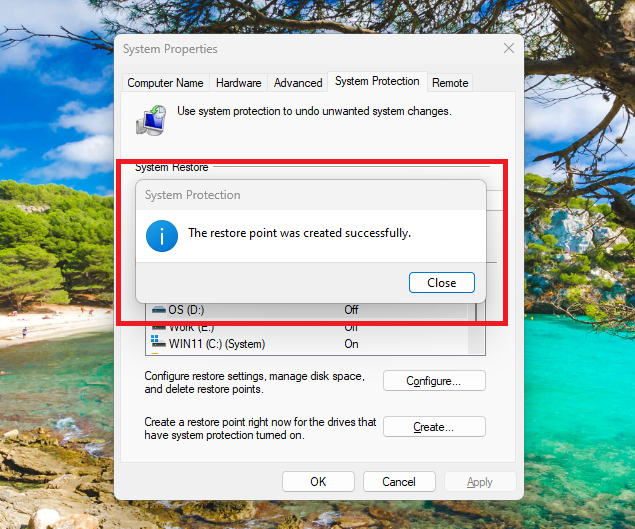
After the process is completed successfully, a message confirming that “The restore point was created successfully” will appear. If anything goes wrong after the debloating process, you can always bring your PC back to its previous working stage with the help of the same System Protection utility.
Ways to Debloat Windows 11
Once you’ve finished updating Windows 11 and setting up a restore point, it’s time to debloat the computer. How to debloat Windows 11 the traditional way — Settings app Settings also allows you to uninstall apps, which is another way of removing many (though not all) regular programs you don’t need. Follow the below methods to do so:
1. Remove Bloatware Using the Settings
Here’s how you can remove unwanted apps and programs that you don’t require using the Settings application.
1. Press the Windows + I buttons on the keyboard at the same time to open the Settings application.
2. Then, click on the Apps tab in the left nav pane and then press the Installed apps on the right side.
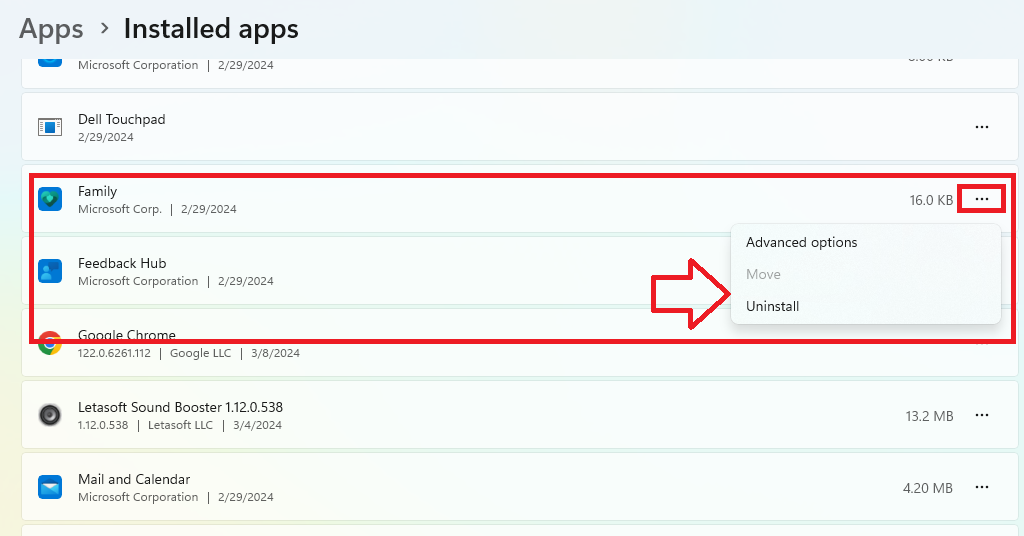
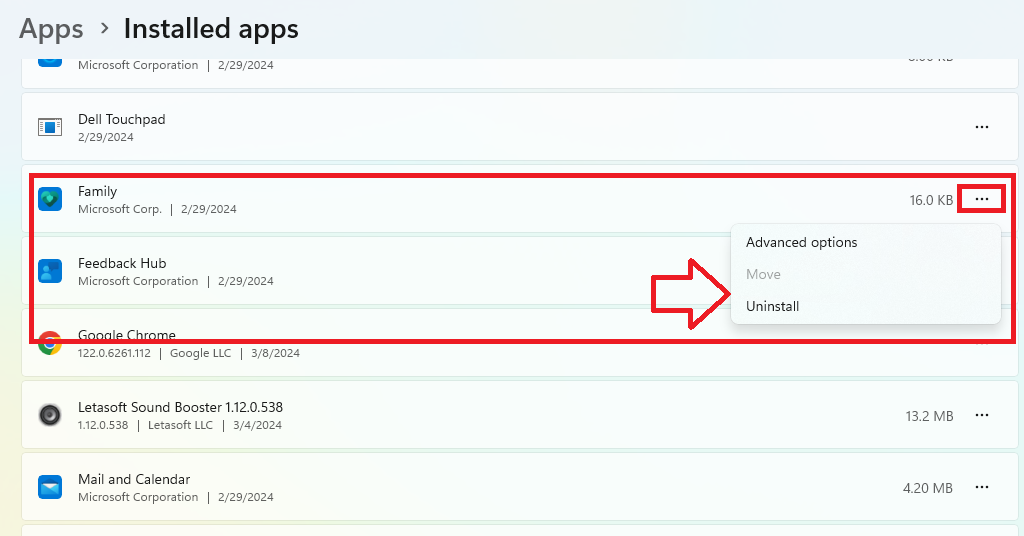
3. Now, click on the three vertical dots in front of the app you want to remove and press the Uninstall button in the drop down menu.
You can follow the same process to uninstall any app you want. It’s worth mentioning that not all the default Windows updates can be removed using this method.
2. Remove Bloatware Using the PowerShell Utility
However, you can still use the built-in PowerShell utility of Windows 11 to uninstall these kinds of apps that we couldn’t by using the Settings app. Windows doesn’t allow you to uninstall many other apps like Photos, Video Player, OneNote, Xbox, People Bar, Camera and etc from the settings app.
Hence, for that purpose here is how to uninstall unwanted apps using the PowerShell utility: Note though, how this functionality doesn’t delete the app from your system — it only uninstalls/hides it for your current account.
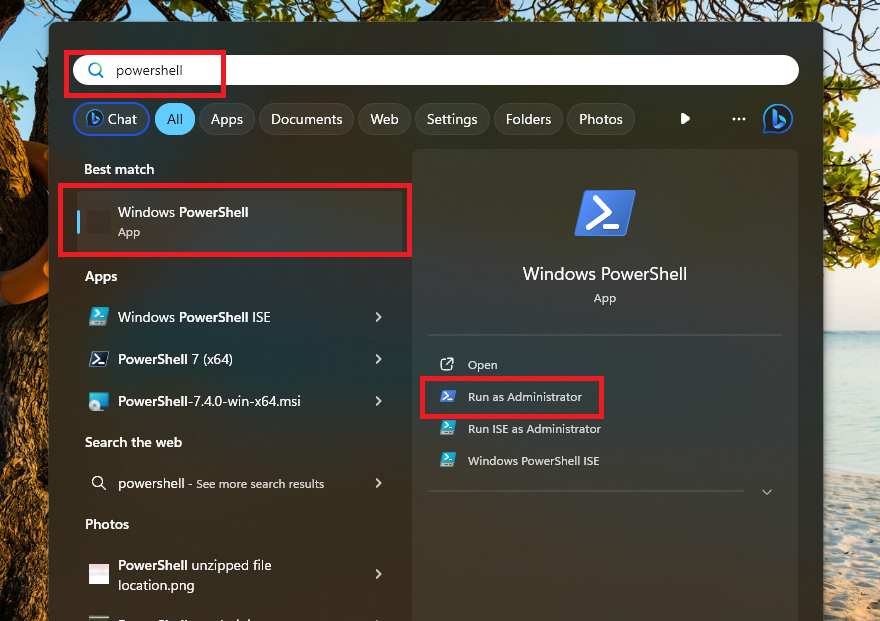
1. Press the Windows key and type”PowerShell” in the search bar. Then, open the utility as an administrator.
2. Now type the command “Get-AppxPackage | Select Name, PackageFullName”, which will give you the full list of applications installed on your machine.
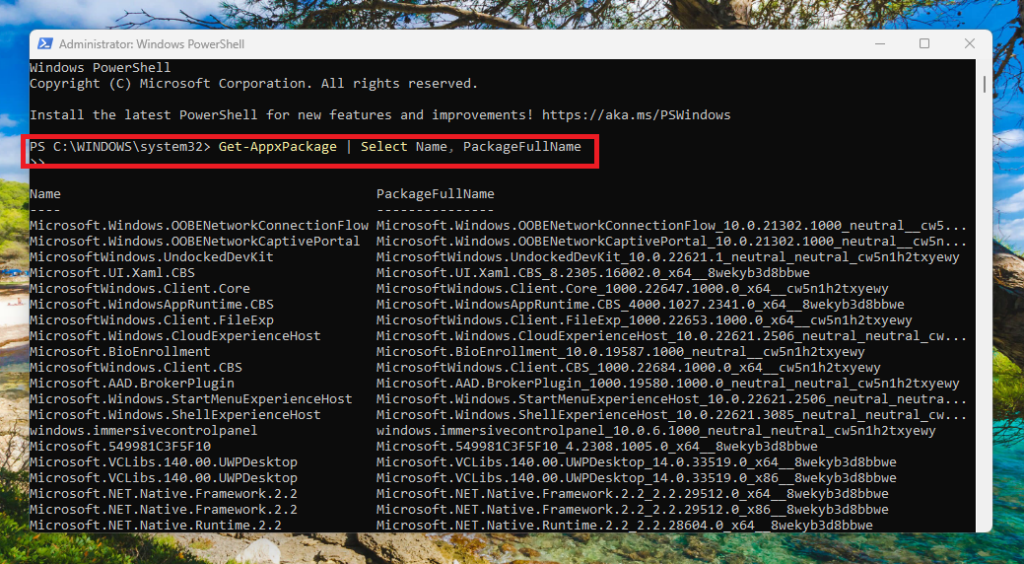
3. Then, copy the name of any app that you want to remove or hide from your system.
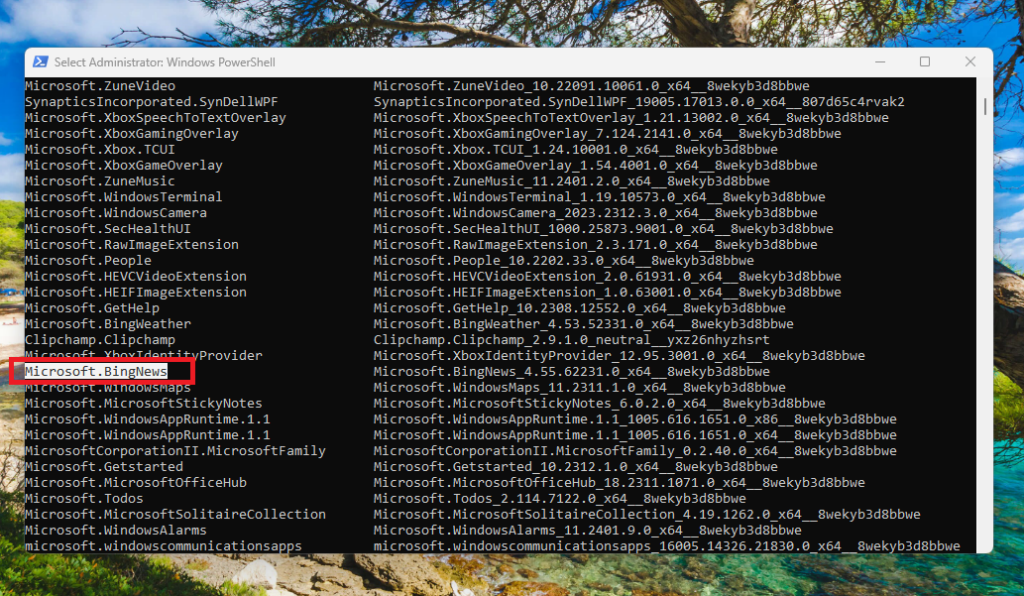
4. Now, type the command “Get-AppxPackage <AppName> | Remove-AppxPackage“. Replace the “<AppName>” text in the command with the name of the app you copied in the previous step.
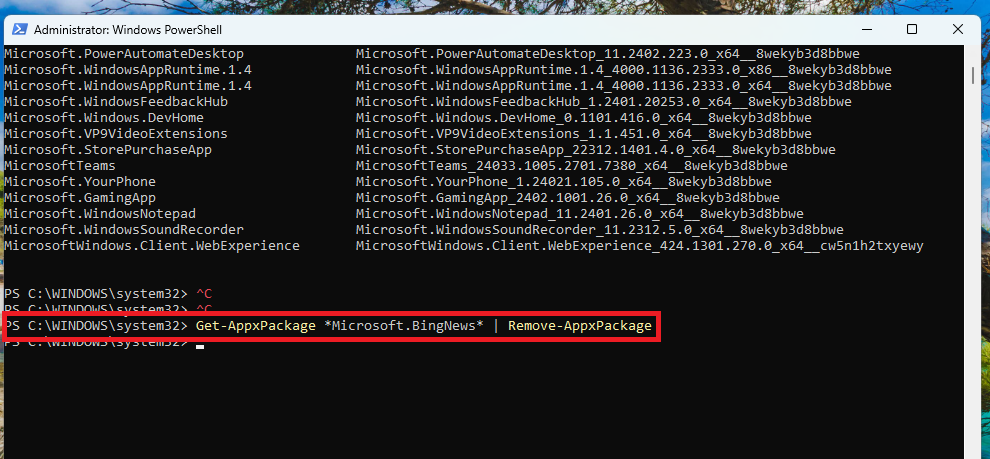
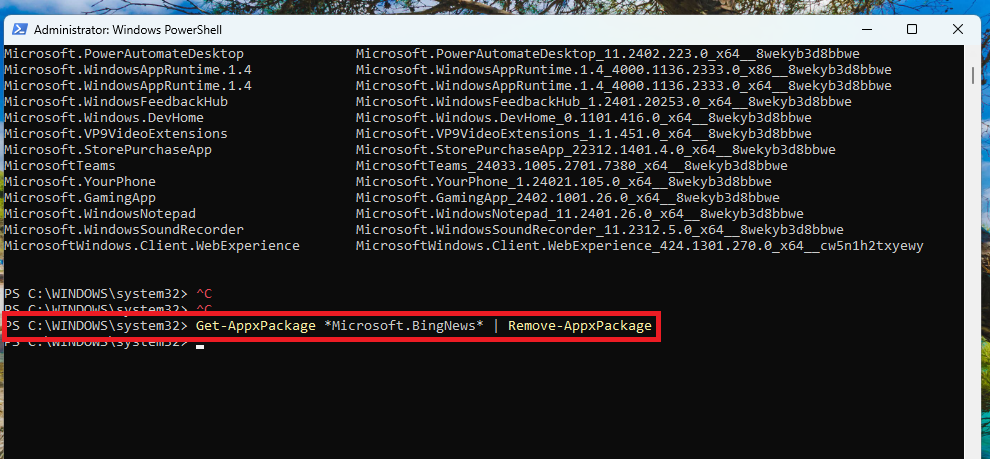
5. For example, if you want to remove Microsoft BingNews from your system, then type the command “Get-AppxPackage *Microsoft.BingNews* | Remove-AppxPackage” and hit the enter button.
If you want to reinstall all the previous preinstalled applications on your system, then type the command “Get-AppxPackage -AllUsers| Foreach {Add-AppxPackage -DisableDevelopmentMode -Register “$($_.InstallLocation)\AppXManifest.xml”}” and hit the enter button. All your previous apps will reappear on your system.
3. Debloat Windows 11 Using DISM Command
Above method will only uninstall/hide the unwanted apps from your Windows 11 machine. If you want to remove all of the junk bloatware completely from your system, though (of which there is plenty), you can perform this function instead using a DISM command: DISM Acronym: Deployment Imaging Service and Management. Essentially, it’s a Super-Powerful Diagnostic Tool that lets you perform all kinds of handy fixes on your Apps!
1. Open the PowerShell utility from the Start menu as an administrator.
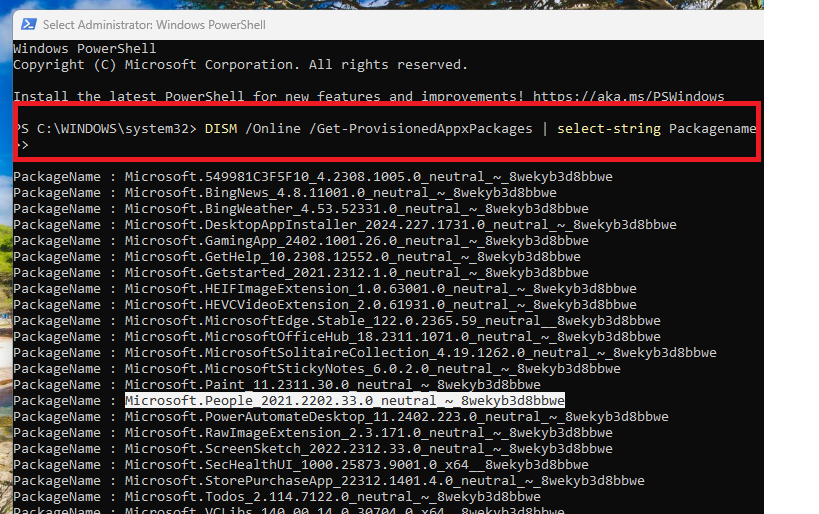
2. In the PowerShell window, type or copy paste the command “DISM /Online /Get-ProvisionedAppxPackages | select-string Packagename” and hit the enter button. This will give you the full list of all installed apps.
3. Now,copy the package name of the app you want to completely remove from your system.
4. Then, type the command “DISM /Online /Remove-ProvisionedAppxPackage /PackageName:PACKAGENAME” and press the enter button. Make sure to replace the PACKAGENAME with the name of the app you want to remove before executing the command.
Now, just confirm that this specific app is about to be wiped off your Windows 11 machine for good. Repeat all the steps above until you have uninstalled all of the programs you would like to remove. It is worth noting that you won’t be able to get these apps even if you create a new account on your device! The only way to get them back is by manually installing them again from the Windows Store.
4. Using a Third Party Program
If you are looking for another way to debloat Windows 11 by cleaning up unwanted applications, then use a third-party program. Several free programs for that can be found on interwebs such as ThisIsWin11, Windows10Debloater-master etc. In this article, we are going to talk about the way of debloating Windows 11 with the script which is already available on the ThisIsWin11 program as a part of it.
1. To start with, go to the GitHub ThisIsWin11 web page and hit the green “Code” button. Then, press the Download ZIP option from the drop down menu.
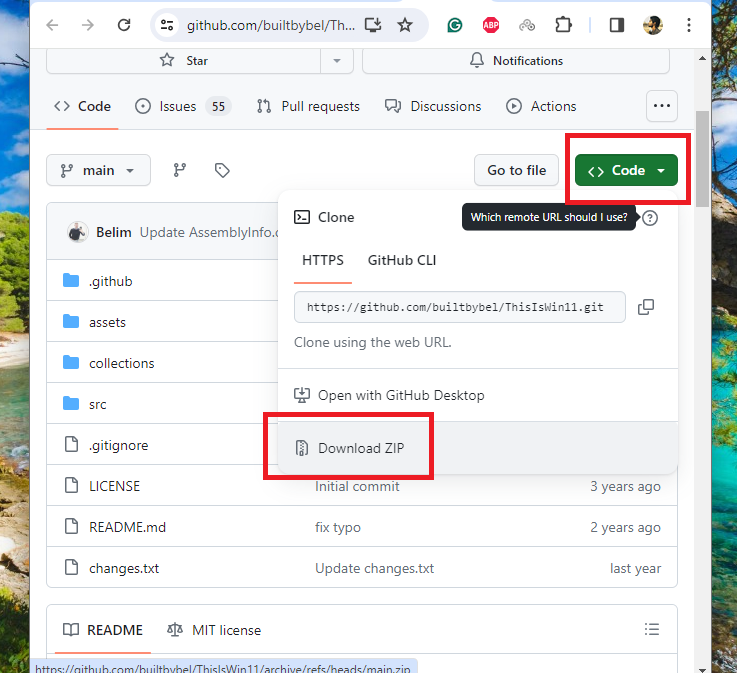
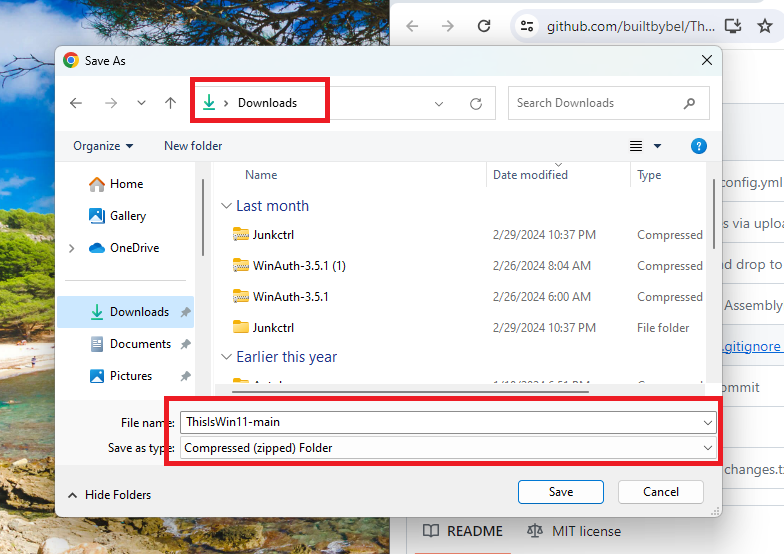
2. Select a location to save the downloaded file on your system.
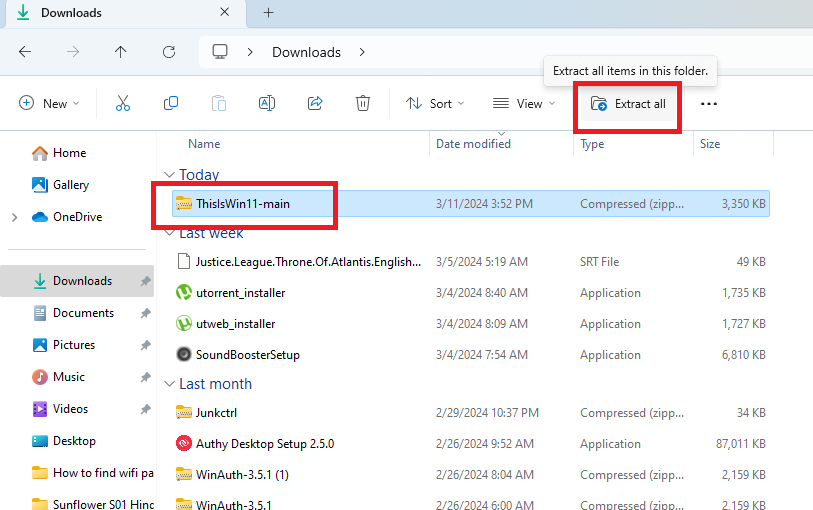
3. Then, click on the downloaded file and hit the option Extract all to get access to the files. Now, select a destination folder for the extracted files.
4. Now, double-click on the extracted .exe file to open the utility.
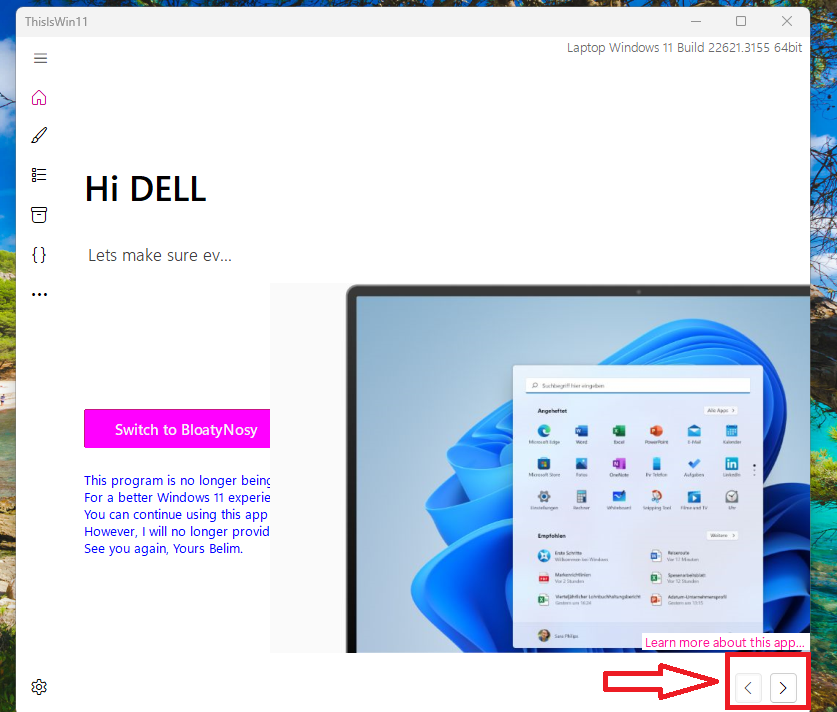
5. On the new window, click the next arrow at the bottom to proceed.
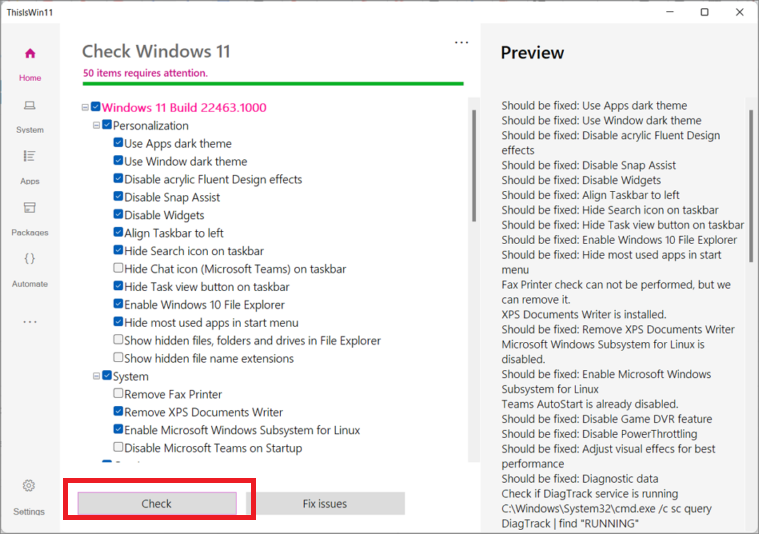
6. In the Modern File Explorer window, click on the Configure this page button. Here, you can click the Check button to view the list of every potential setting change.
7. Now, toggle any option you want and click the Fix issues button to apply the new changes. Changing these settings will help the performance of your Windows 11 machine.
8. Then, click on the Apps button in the left navigation pane to see the extensive list of applications on your PC.
9. Here, you can select the apps you want to remove and click on the Move Selected option to put them in the recycle bin.
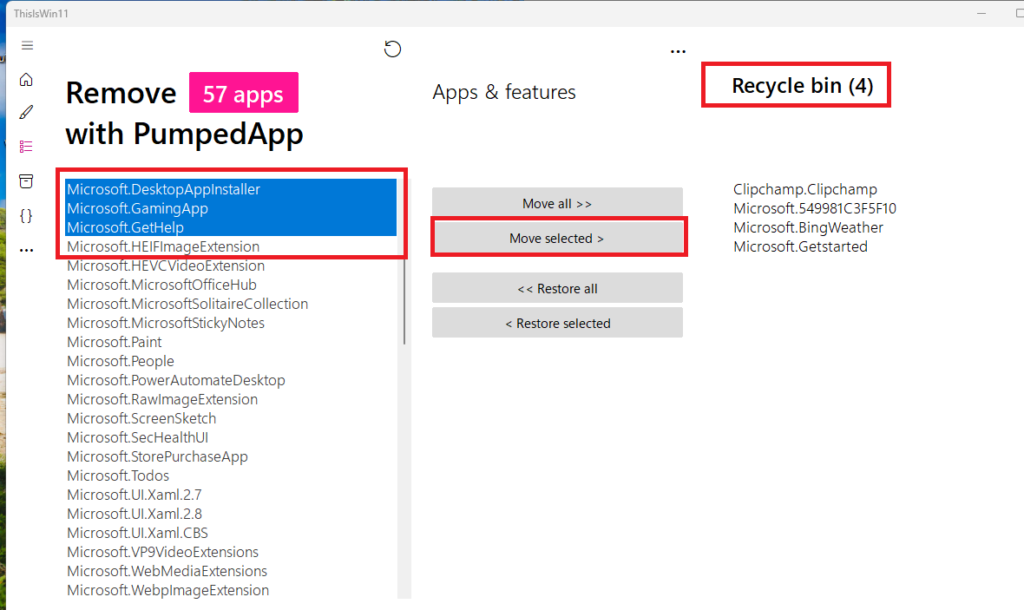
10. Finally, click on the Empty Recycle Bin button to remove those apps from your system.
You can also use the remove all apps feature to completely clear the system. However, we do not recommend this because you can very easily remove a pertinent system, and your computer will probably crash.
Final Words
After you try out all the following solutions to debloat Windows 11, you won’t have any of these useless apps left in your computer—they’re all removed! Before we delve further into what obsolete apps you have installed on your PC, our first advice is to visit Settings and remove the apps you don’t like from Installed Apps.
Finally, other features that get disabled/disbanded with the above methods include One Drive and similar references to telemetry services, including Cortana, etc. It would make a big difference to how well your system performs. Just restart your machine at this point, as all the methods you tried will have no effect until you do.


