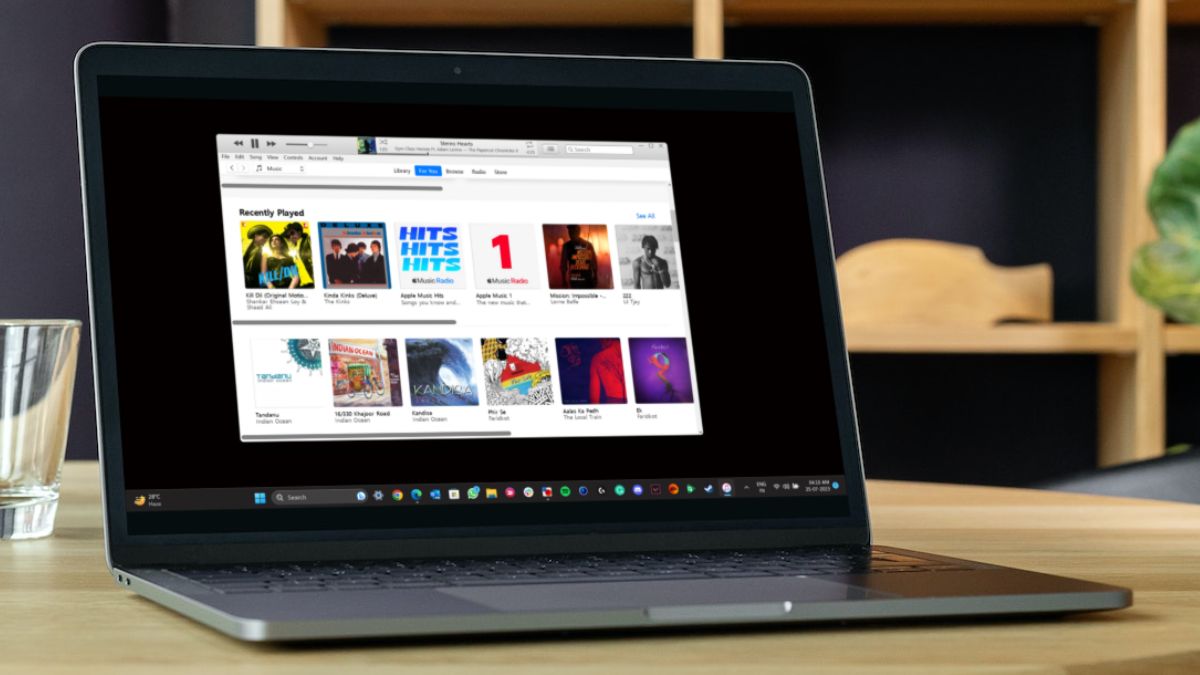
Apple’s iTunes has been a great music player ever since it was introduced in 2001. Yes, the music player can be used on Windows PCs and laptops as well, and the device’s original platform had the music player added in late 2003. However, it took Apple until 2018 to put iTunes in the Microsoft Store for Windows users to get the music player as well in UWP format.
As a result, this article is invaluable if you want an informative guide on how to install and use Apple’s iTunes on your Windows 11 PC or laptop. This article discusses every topic on how to successfully set up and use iTunes on a Windows 11 PC.
This piece thoroughly covers everything from the simplest steps to the final steps, including streaming songs in Apple Music. The following sections cover the most useful information you should get.
iTunes Win32 Format vs UWP Format on Windows 11
No, these below subtitles mean you are going to read this article separately in different subtitles for easy access. But one thing I must tell you before that.
“That is, “Currently, the Apple iTunes application is available in a Windows OS format both in Win32/64 and UWP. That is on Windows 11 PC or laptop, you can either download the official iTunes software from Apple iTunes and run it independently as an app, or, instead, get it from Microsoft Store and install it as a UWP app on your device”.
Therefore, you do not need to worry about what is the difference. If you install an Apple iTunes from the official website. It will update every app update on Windows 11 PC update using Apple updater.
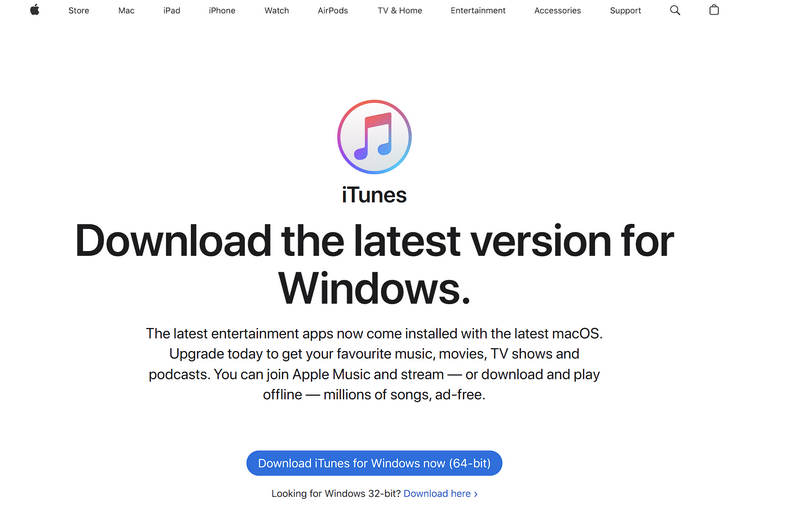
Or else, in case you download the app from the Windows Microsoft Store, your app will be updated via Microsoft’s update service on your machine. Suppose you do not use the above application, the app will be the same.
Therefore, for this article, I will research you also how to Install iTunes via the Windows Microsoft Store on your Windows 11 PC or laptop. For warning, iTunes is fairly more optimized on a laptop once you have downloaded it from the Windows Microsoft Store than when installed as a separate service in Windows 11. In addition, our process will be downloadable on a Windows 11 PC or laptop once downloaded from home only compatible device.
How to Install iTunes on Windows 11
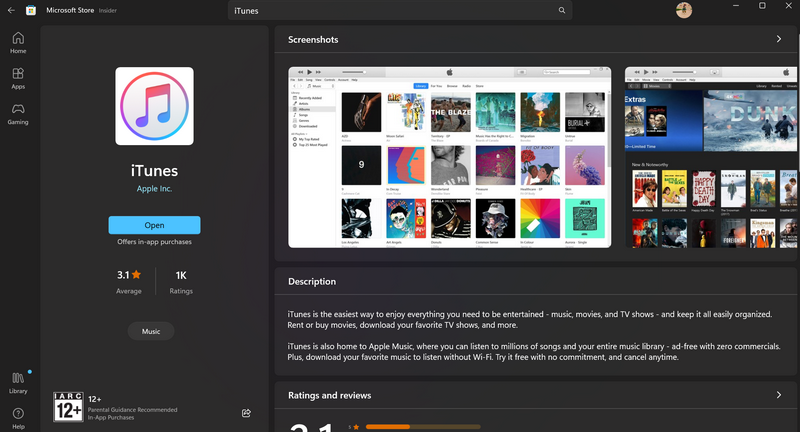
To install Apple’s iTunes via the Microsoft Store on your Windows 11 PC or laptop, you can follow the steps mentioned right below:
1. Use Windows + S to launch Windows Search and find Microsoft Store.
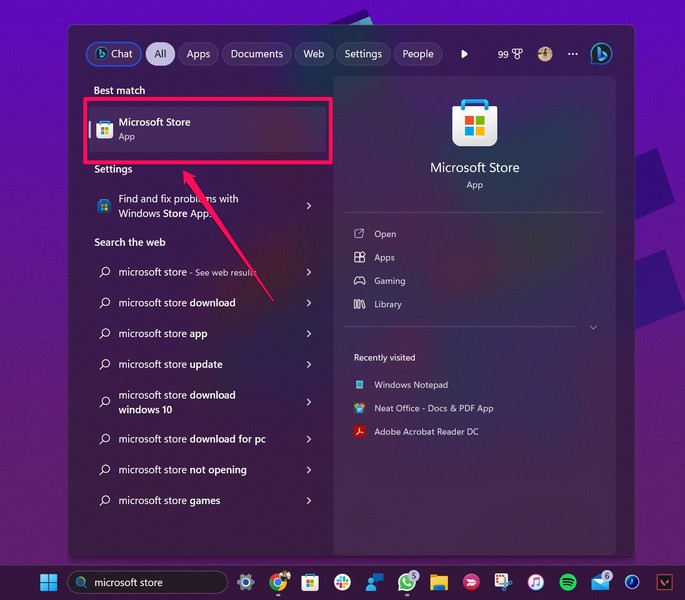
2. Once the Microsoft Store app is launched, use the search bar above to find iTunes.
3. Click the app listing to open it in the store.
4. Then, click the Install button to initiate the installation process.
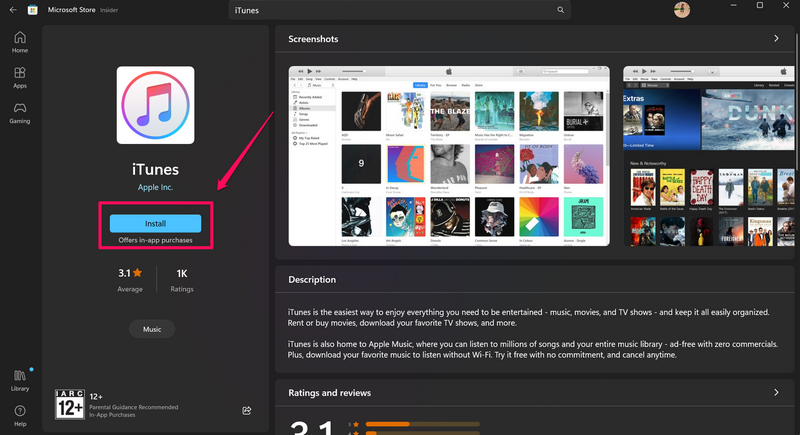
5. Wait for the installation to complete.
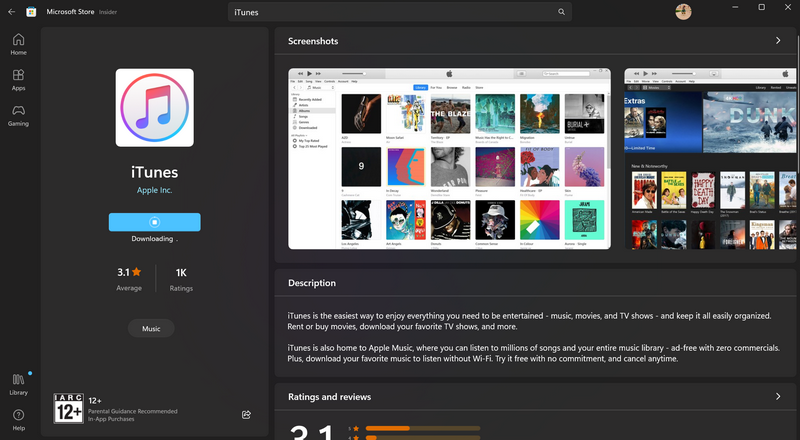
Congratulations! You have now successfully installed iTunes on your Windows 11 PC or laptop. Proceed to the following section to know how to set it up and start using it on your device.
How to Set Up iTunes on Windows 11
To set up iTunes on your Windows 11 PC or laptop after its installation, follow the provided steps below:
1. Once the app is installed on your PC or laptop, use Windows Search to locate it on your device.
2. Launch the said app. You can also click the Open button in the Microsoft Store app listing after the installation to launch the app on your device.
3. Follow the on-screen instructions and Agree to the terms and conditions.
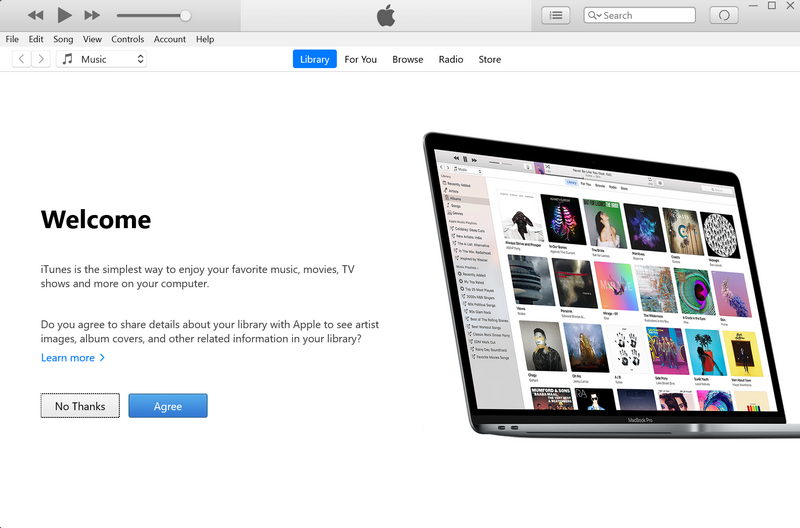
Now, you are all set to use iTunes on your Windows 11 PC or laptop.
How to Sign in to iTunes with Apple ID on Windows 11
Now, starting iTunes on your Windows 11-powered desktop, all songs in your Library will be automatically synchronized from your Windows. Still, again, you would not be able to listen to any song via the app in case you do not have an Apple Music plan.
However, if your Apple ID already has an Apple Music subscription plan, the steps below would be necessary to perform while logged in with your Apple ID to get access to Apple Music via iTunes desktop on your Windows 11:
1. In the iTunes app, you can click the Account button on the above menu bar and hit the Sign in button.
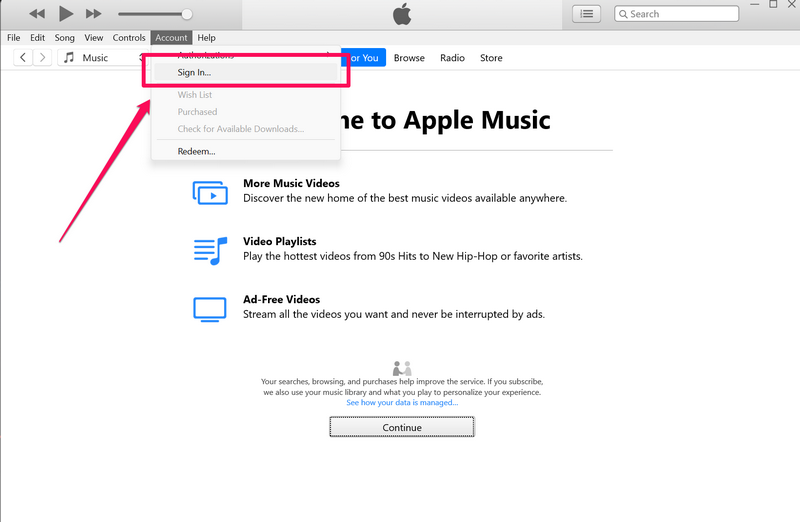
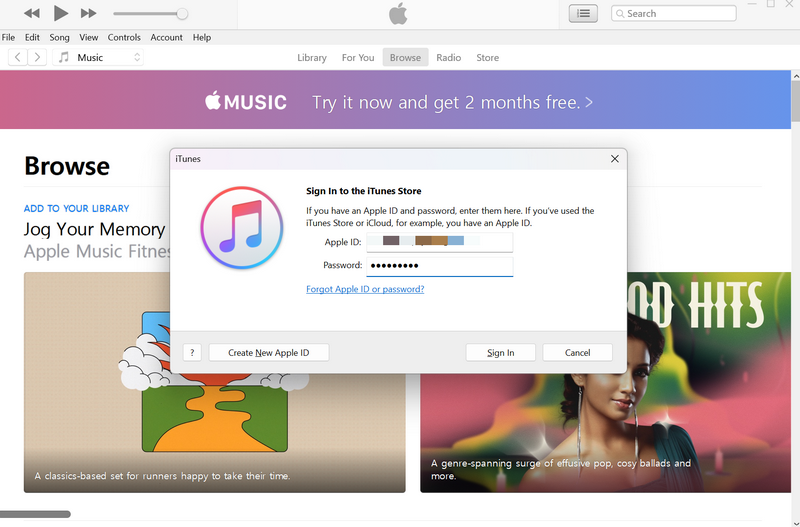
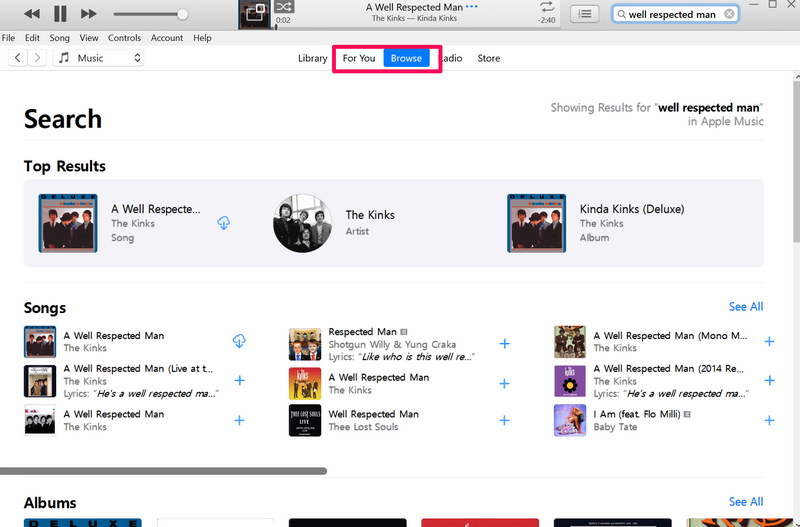
2. Otherwise, you can go to any of the tabs such as For You, Browse, and Radio, and follow the on-screen instructions to bring up the iTunes Store Sign-in UI.
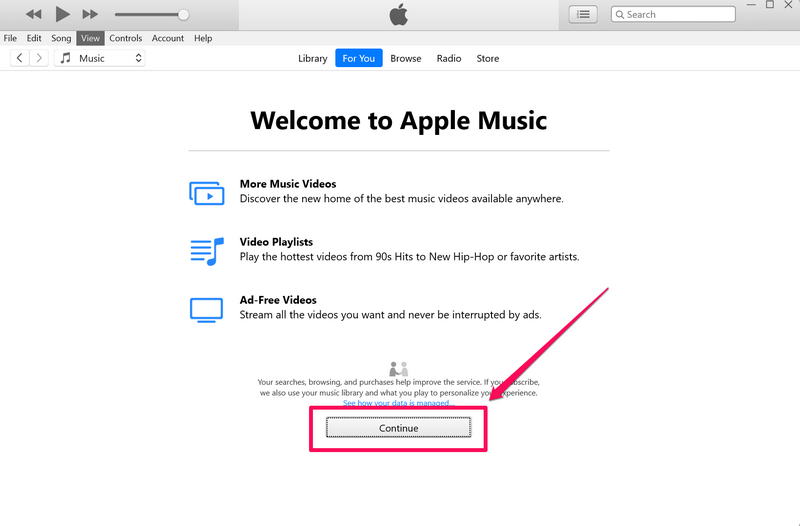
3. Now, put in your Apple ID credentials in the corresponding text fields and hit the Sign In button.
4. Wait for the sign-in process to complete.
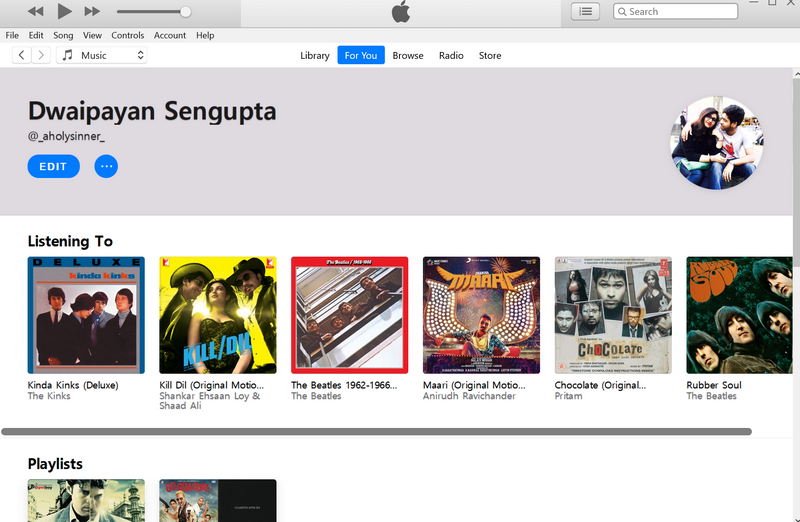
5. And with that, you are ready to stream music on Apple Music in iTunes on your Windows 11 PC or laptop.
How to Play Songs in Apple Music in iTunes on Windows 11
Now, to stream music on Apple Music using the iTunes app on your Windows 11 PC or laptop, follow the steps right below:
1. With the iTunes app opened on your Windows 11 device, use the search bar in the upper right corner to search for the song you want to play.
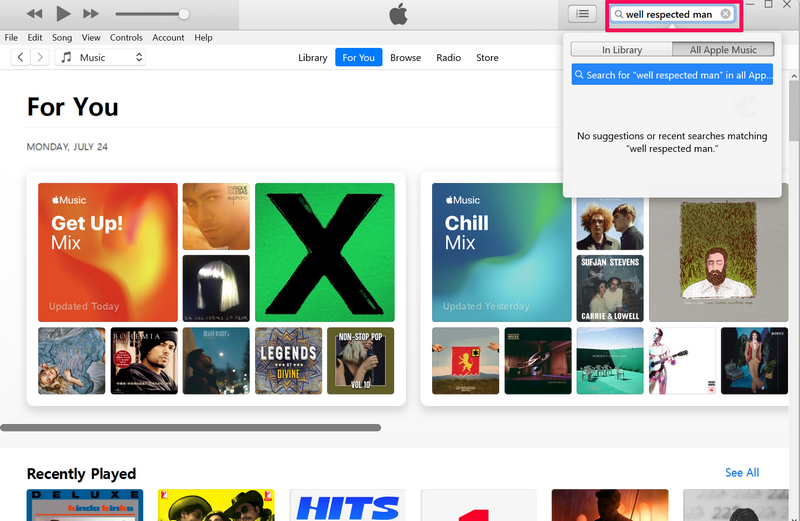
2. You can also switch between the Library and All Apple Music tabs to search for the song in the respective locations.
3. You can then click on the song to start playing it.
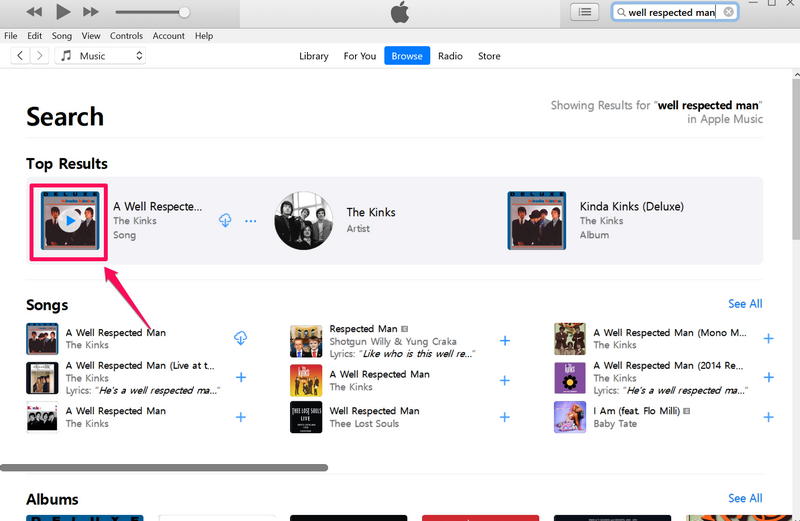
4. Alternatively, you can browse songs in the For You and Browse tabs and click on your preferred ones to start playing.
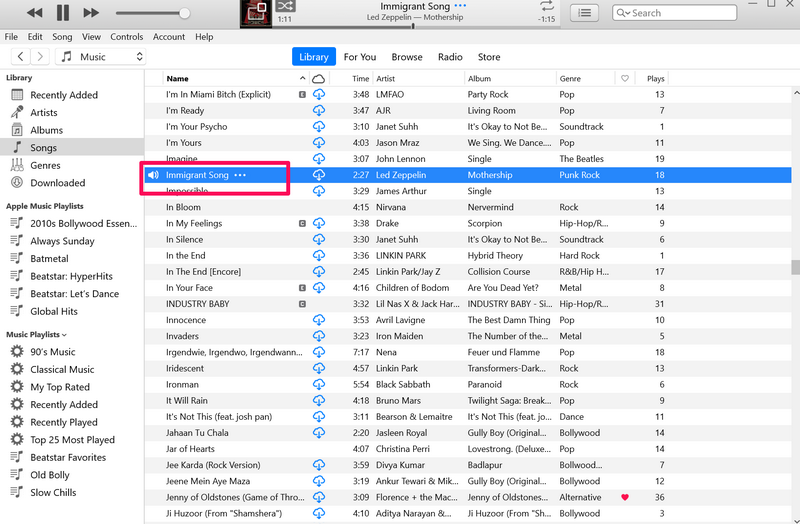
5. You can also double-click on any song in your Library to start playing it on your Windows 11 PC or laptop.
How to Manage Songs in iTunes on Windows 11
Now, once you start playing songs in iTunes on your Windows 11 PC or laptop, take a look at the steps below to get an idea about how you can manage them within the app:
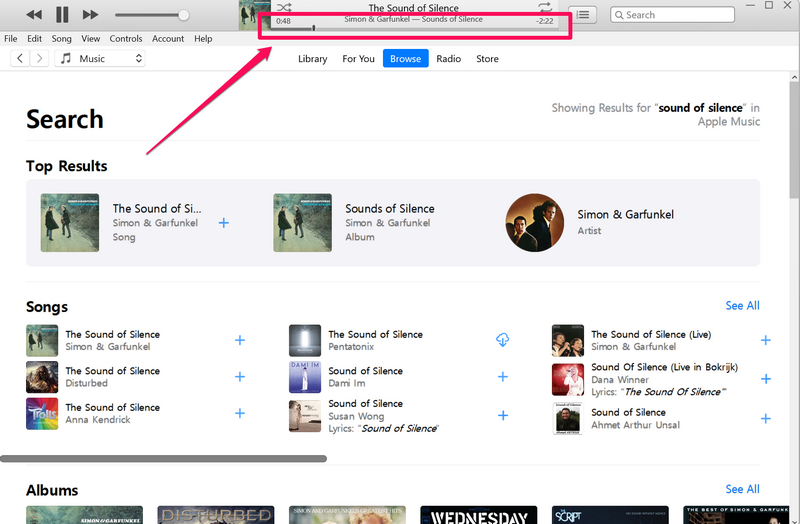
1. To seek the song timeline of the current song that is playing on your device, you can click and hold the seek bar on the Now Playing UI and drag it left or right.
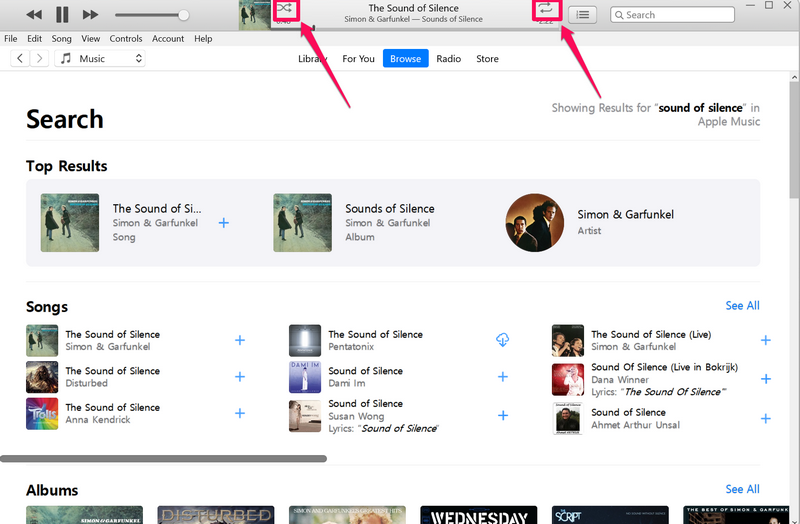
2. On the Now Playing UI above, you can click the Shuffle button to shuffle the songs on your Up Next list. You can also click the Loop button to cycle between different loop modes. This will repeat your current song once or twice on iTunes.
3. Next, you can click the Hamburger button beside the Now Playing UI to access your Up Next list, History List, and the song lyrics (if available).
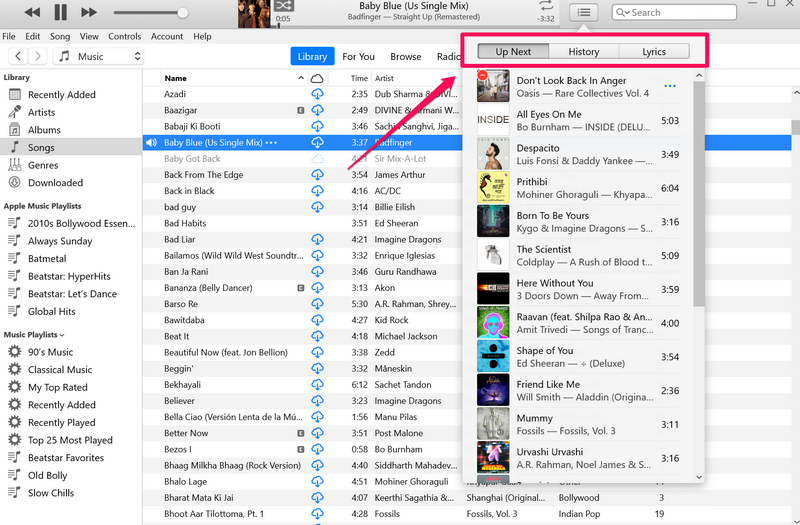
4. On the Up Next list, you can click and hold a song and drag it up or down to adjust its position on the list.
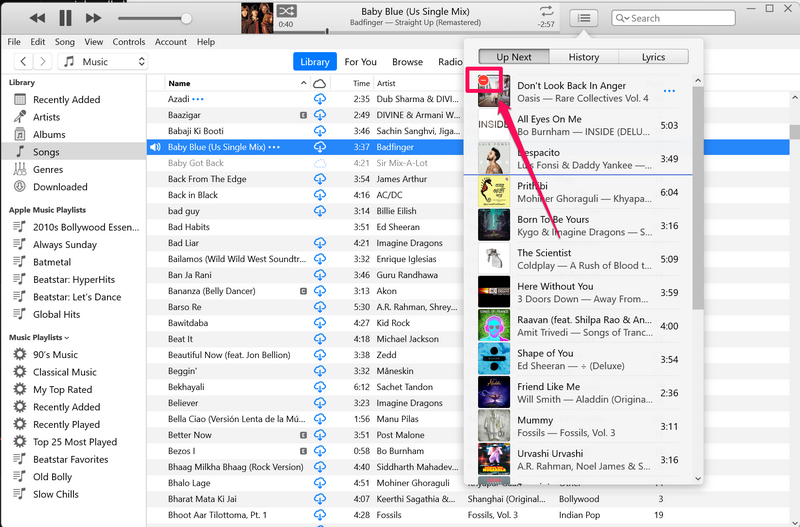
5. You can also click the Remove button on the song covers on the Up Next list to remove them from it.
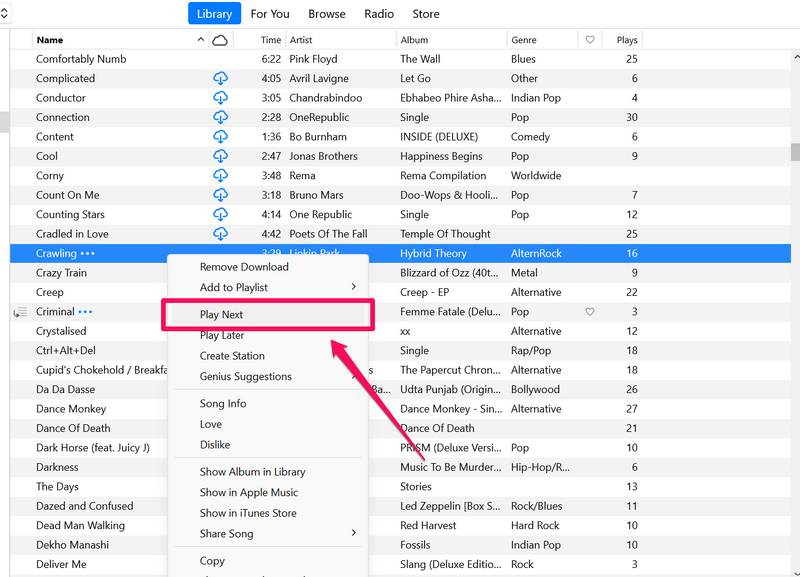
6. You can also add new songs to your Up Next list by right-clicking them and selecting the Play Next option on the context menu.
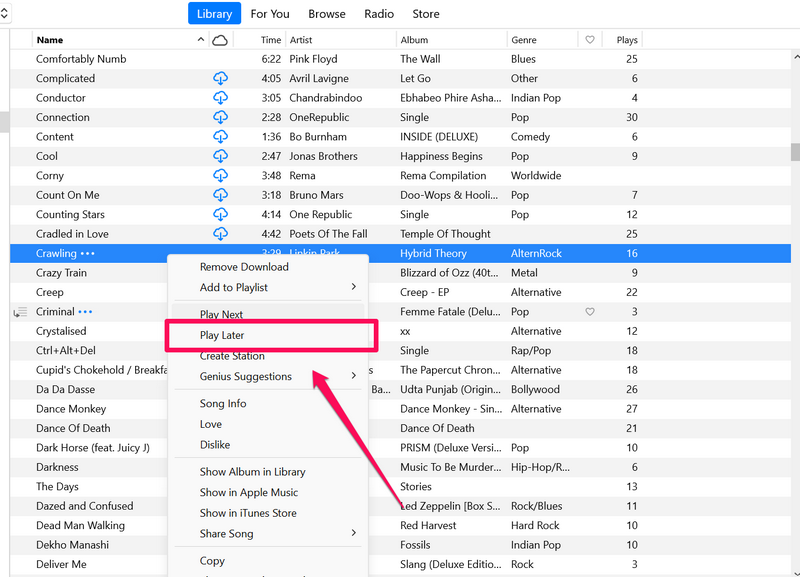
7. If you want a song to play after the next song on the Up Next list, you can select the Play Later option on the context menu.
8. In case you want to add new songs from Apple Music to your iTunes library, you can search for the song or locate it in the For You or Browse tab and click the + button beside it to add it to your iTunes Library.
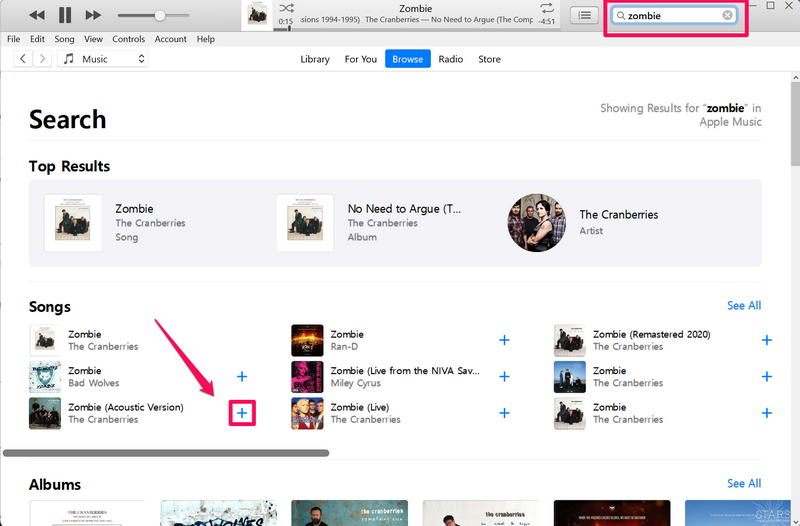
Note: The songs you add to your iTunes Library will also reflect in the Music app on your iPhone, considering it is signed in with the same Apple ID on your iPhone or iPad.
So yeah, these are basic things that you should know to manage your songs in iTunes on your Windows 11 PC or laptop.
How to Use iTunes Mini-Player on Windows 11
If you prefer to have your music player as a PiP window, Windows 11’s iTunes app will allow you to do so. You may diminish the application to your Windows 11 device by minimizing the app UI to a miniature-sized window and keeping it on all the time while floating on your Windows 11 screen, with the music control buttons accessible to you at all times.
So, follow the steps right below to use the iTunes mini-player on your Windows 11 PC or laptop:
1. With the iTunes app opened on your Windows 11 PC or laptop, click the Album cover of the song in the Now Playing UI (screenshot below).
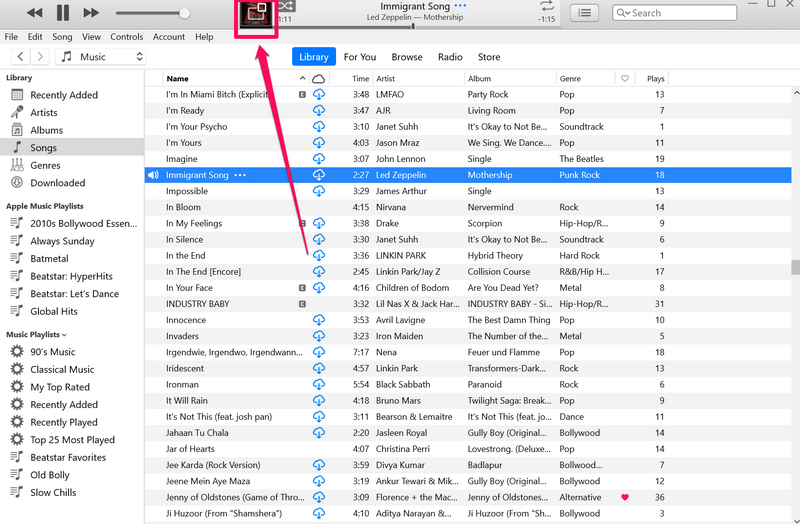
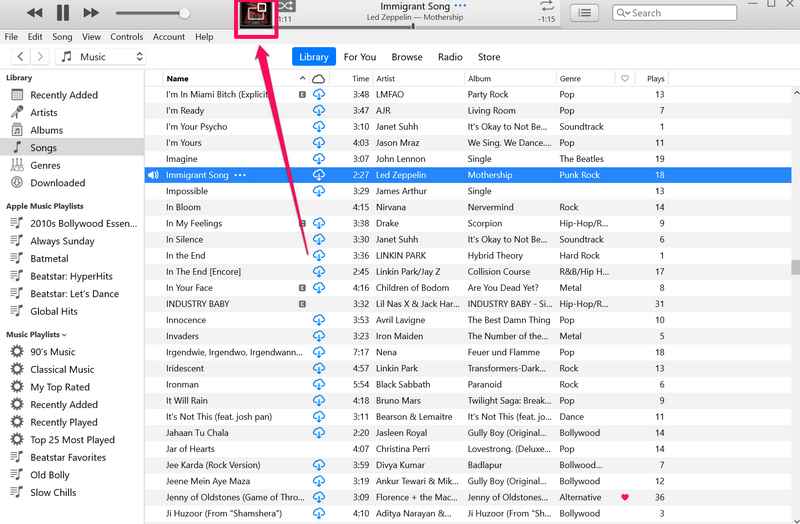
2. You will see the iTunes app turn into a mini music player with just the Album cover of the current song and the title of the song, appearing in a floating window.
3. You can access the seek bar of the current song, the Play-Pause-Next control buttons, the search icon, and the Up Next list button.
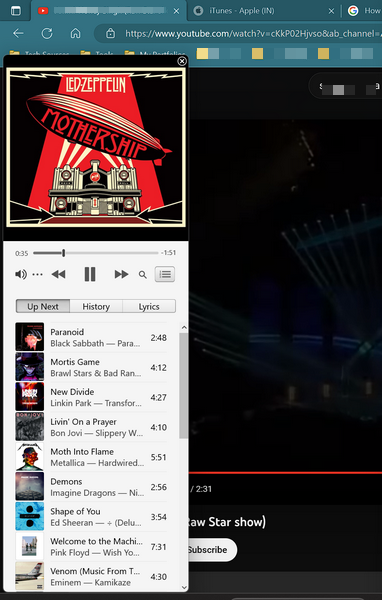
4. If you want to close the iTunes mini-player and return to the regular window view, take the cursor on the iTunes mini-player window to reveal the tiny x (cross) button in the upper right corner and click it.
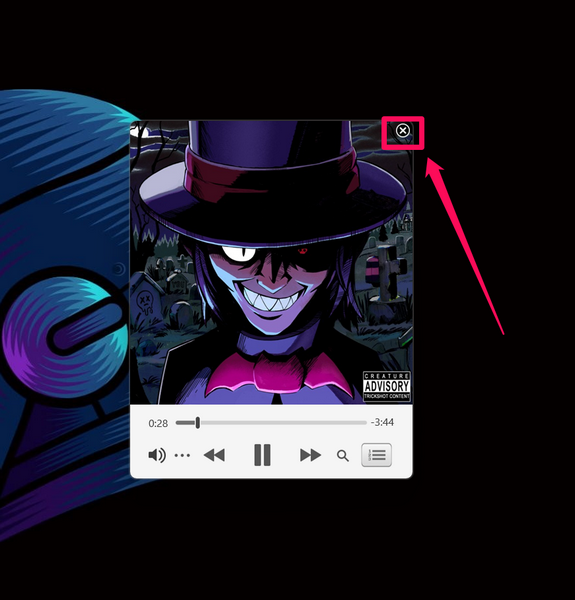
So yeah, these are the basics of using the iTunes min-player on your Windows 11 PC or laptop.
How to Use iTunes with iPhone on Windows 11
If you use an iPhone, iTunes is the ideal program to maintain your iOS device in a Windows 11 laptop or PC. All you have to do is connect your iPhone with a USB wire to your Windows laptop to upgrade it, restore it, and transfer music or any other items.
Follow the instructions To connect the iPhone to the Windows 11 laptop or PC via iTunes.
1. After connecting your iPhone to your Windows 11 PC or laptop, launch the iTunes app on your device.
2. You will get a prompt to Continue or Don’t Continue sharing information with the connected device.
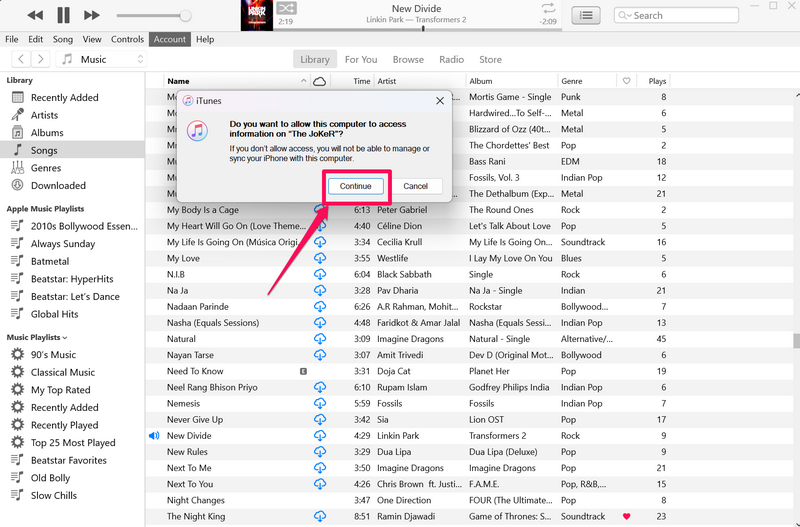
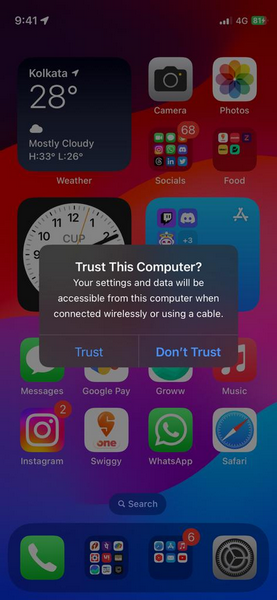
3. The same prompt will show up on your iPhone as well. You will have to select the Trust option on your iPhone and the Continue button in the iTunes app to connect your iPhone to your Windows device.
4. Once they are connected, click the Phone button in the iTunes app (screenshot below) to open the iPhone management page.
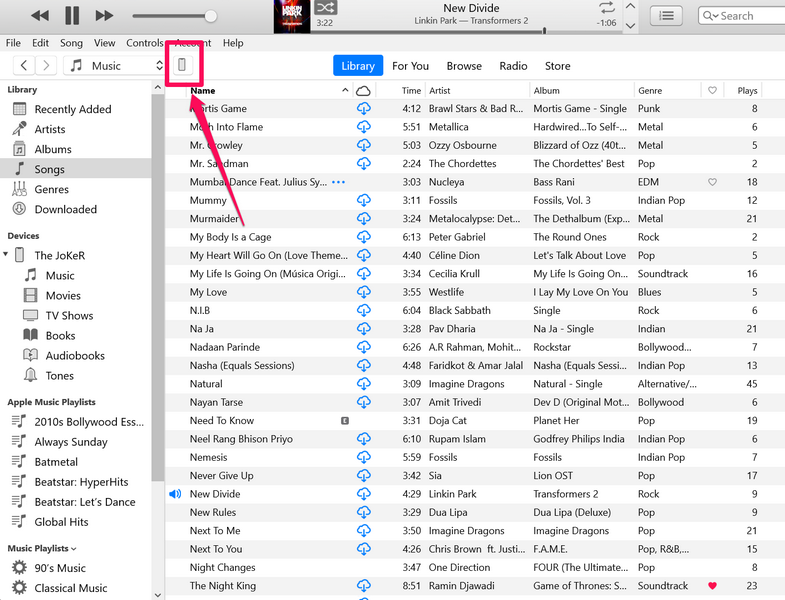
5. You will find various options to manage your iPhone via the iTunes app on your Windows 11 PC or laptop.
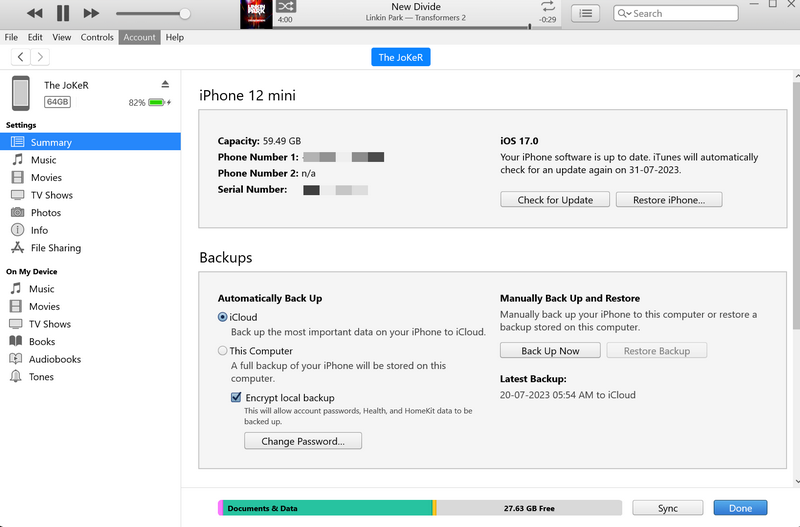
6. You can also view the battery level of your iOS device in the iTunes app, check for updates, and restore your device.
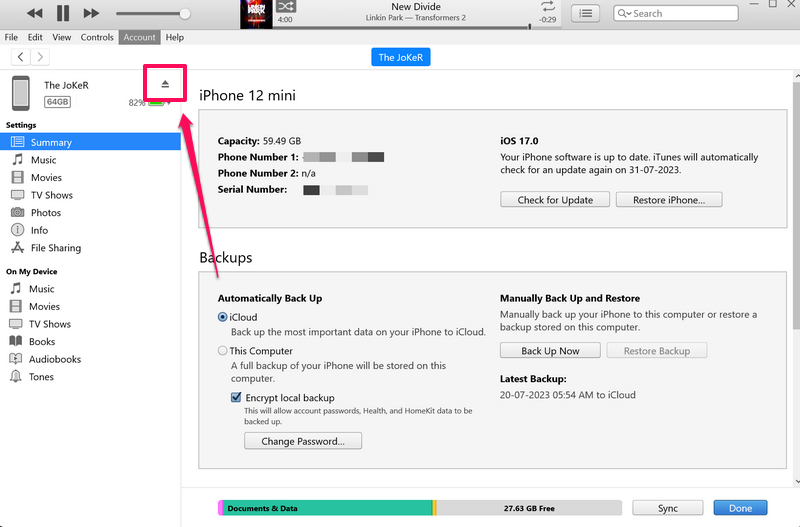
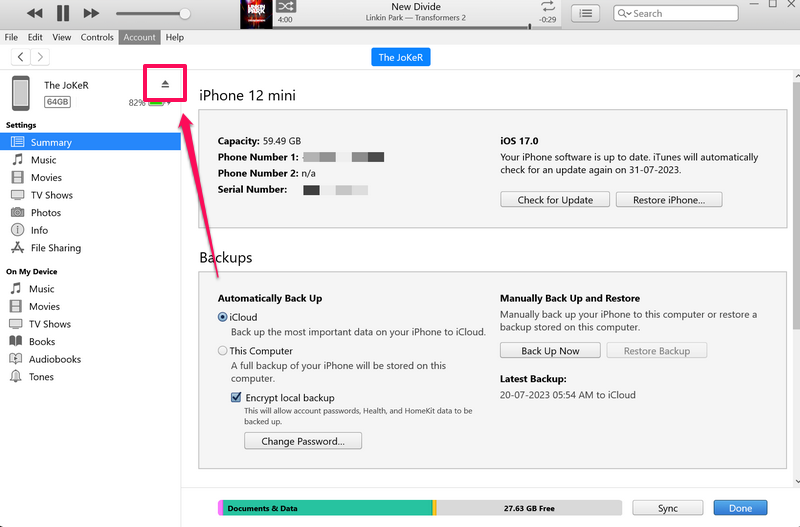
7. If you want to disconnect your iPhone from your Windows device, make sure to click the Eject button in the iTunes app.
How to Use iPod with iTunes on Windows 11
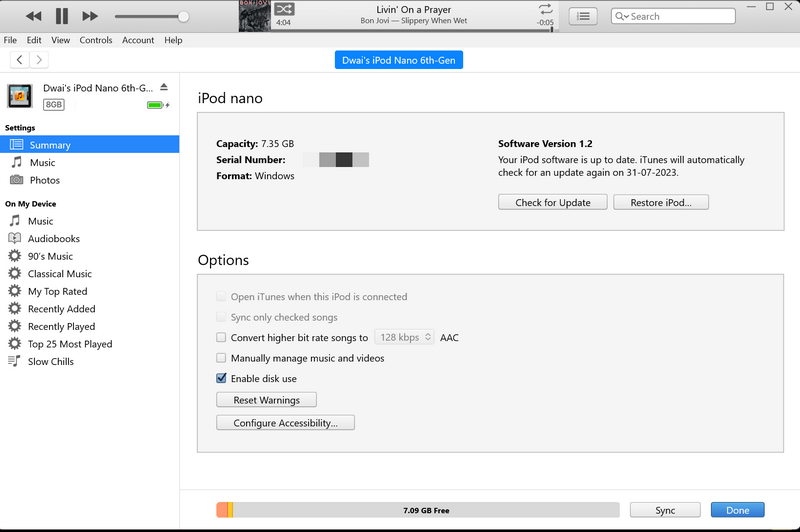
If you have an Apple iPod at your disposal in 2023, you can carry out the management and restore operations using iTunes on Windows 11, too. Moreover, when an iPod has not been turned on for too long, iTunes is the only way to restore it to operation.
You will also need the connection cord given with the iPod to connect it to your Windows 11 PC or laptop. The step-by-step instructions are as follows:
1. Once you connect an iPod that needs restoration, you will be presented with a Welcome screen.
2. Follow the on-screen instructions to set up the iPod as a new device.
3. After completion, you will find an iPod icon in the iTunes app (screenshot below) on your Windows 11 device, representing your iPod model. Click it to open the iPod management page.
4. From here, you can sync media to your iPod, check for the latest updates, and restore the device to its factory settings.
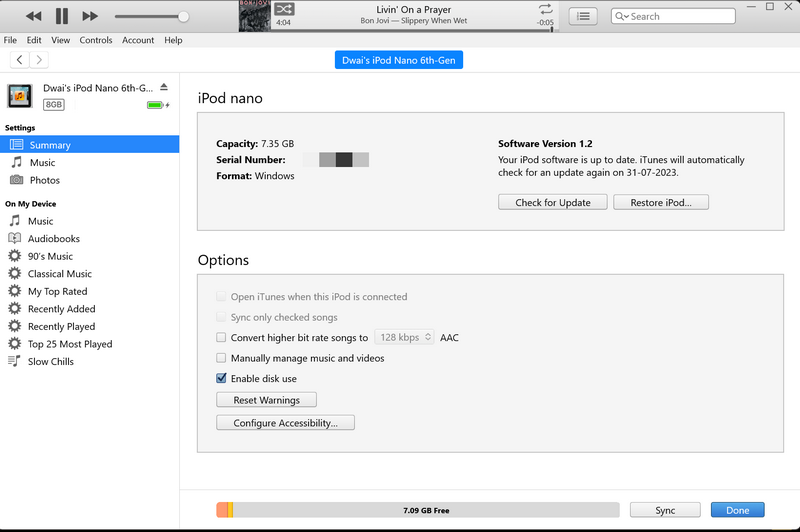
5. Once you are done, click the Eject button before disconnecting your iPod from your Windows 11 device.
How to Authorize Your Windows 11 PC in iTunes
In the iTunes app on your Windows 11 PC or laptop, signing in with your Apple ID validates the Windows device on which you are running the app, confirming to the app that it is safe to trust the Windows device. As a result, on your Windows 11 PC or laptop, you can listen to your iTunes Store-acquired songs or retrieve any purchases you have downloaded previously.
So, follow the steps right below to authorize your Windows 11 PC or laptop in iTunes:
1. Launch the iTunes app on your Windows 11 device and make sure you are signed with your primary Apple ID.
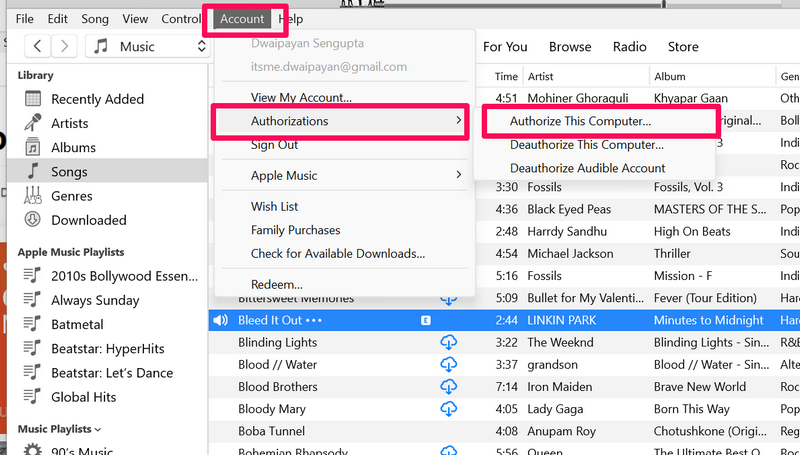
2. Click the Account button on the above menu bar and take the cursor to the Authorizations menu.
3. On the sub-context menu, click the Authorize This Computer… option.
4. You will need to enter your Apple ID password on the following prompt to confirm the authorization.
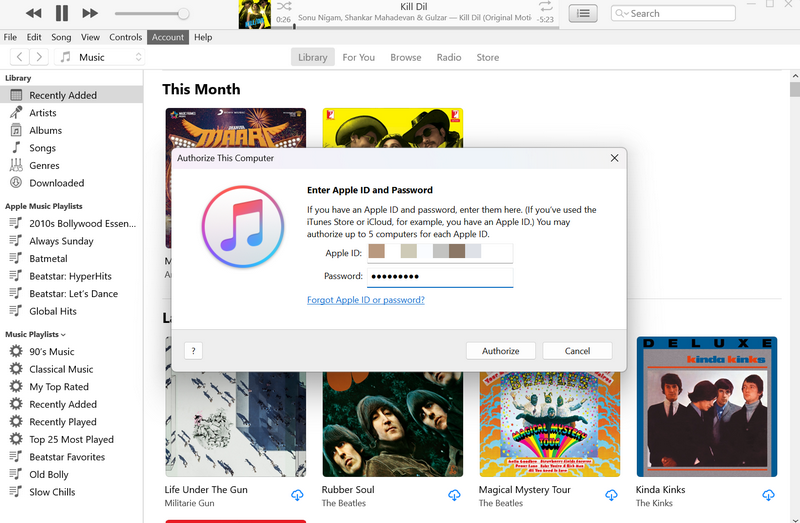
Note: You can authorize up to 5 devices with a single Apple ID, including iPhones, iPads, MacBooks, and Windows computers.
5. Click the Authorize button to proceed.
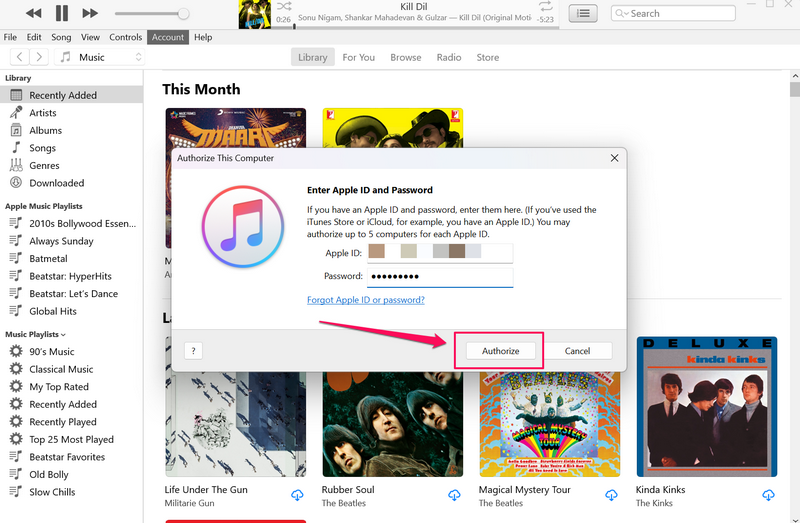
Now, your Windows 11 PC or laptop will be added to the authorized list. In my case, my device was previously authorized and was re-authorized after the process.
How to Deauthorize Your Windows 11 PC in iTunes
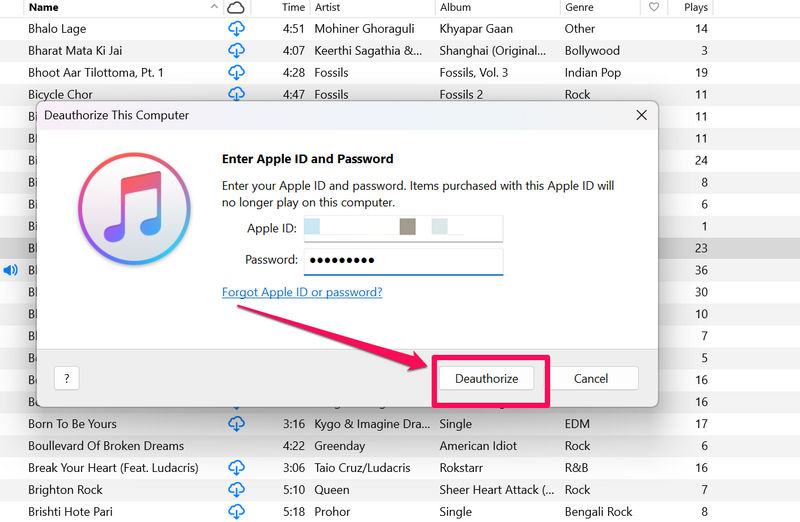
In case you need to deauthorize your Windows 11 PC or laptop, you can do so in iTunes. Follow the steps right below to deauthorize your Windows 11 device in iTunes:
1. With the iTunes app opened, click the Account option on the above menu bar.
2. Take the cursor to Authorizations and this time, click the Deauthorize This Computer… option on the sub-context menu.
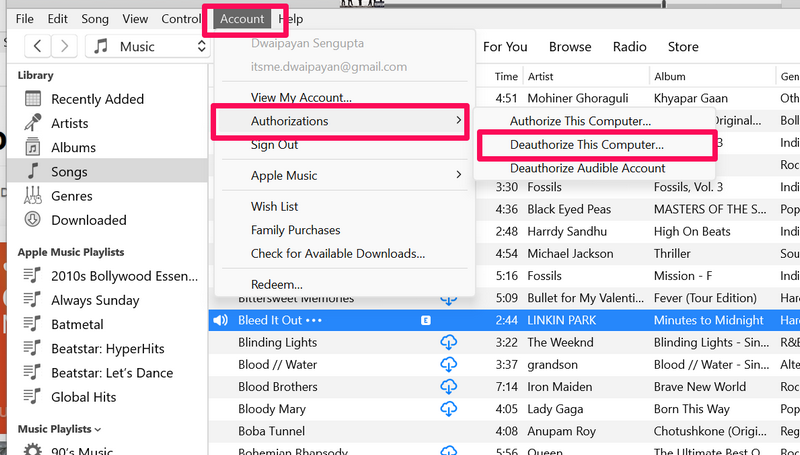
3. Provide your Apple ID password on the following prompt and click the Deauthorize button to deauthorize your Windows 11 PC or laptop.
How to Sign Out of Apple ID in iTunes on Windows 11
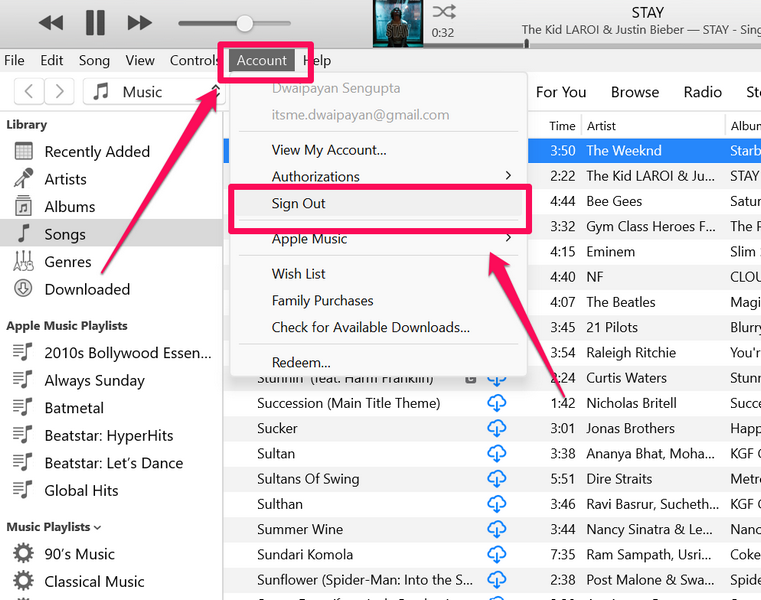
If you want to sign out of your Apple ID in the iTunes on your Windows 11 PC or laptop, follow the steps right below.
1. In the iTunes window, click the Account option on the menu bar.
2. On the drop-down menu, click the Sign out option and you will be instantly signed out of your Apple ID in iTunes on your Windows 11 PC or laptop.
How to Check for iTunes Updates on Windows 11
Now, if you want to check for updates for the iTunes app on your Windows 11 PC or laptop, follow the steps right below:
1. Launch the Microsoft Store on your Windows 11 PC or laptop.
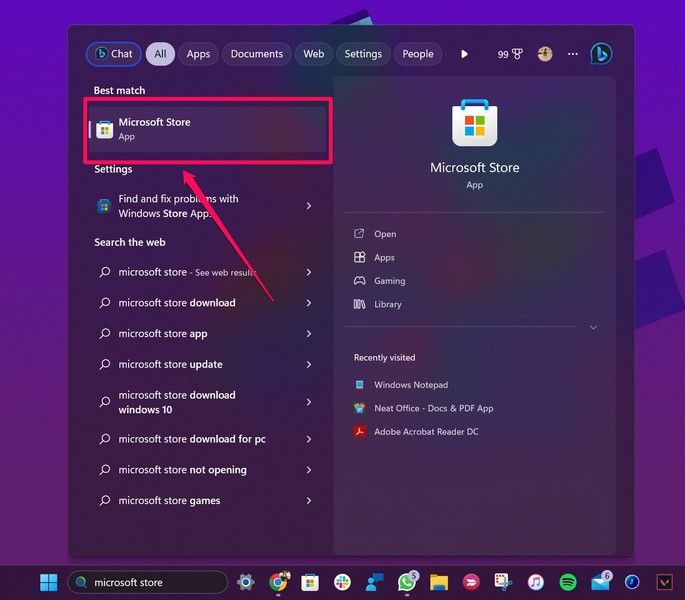
2. Click the Library tab on the side navigation bar to open the app update page.
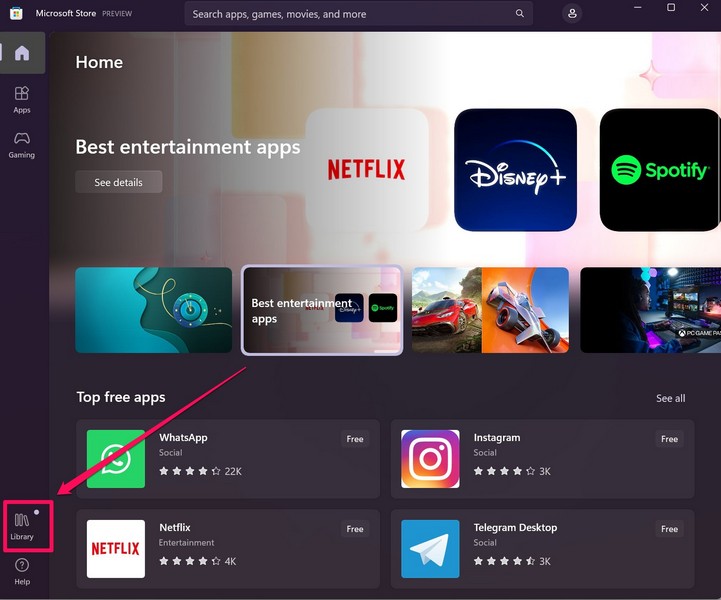
3. If the iTunes app has an update available on your PC or laptop, it will appear on this page.
4. In case it does not show up instantly, click the Get Updates button to check for the latest updates.
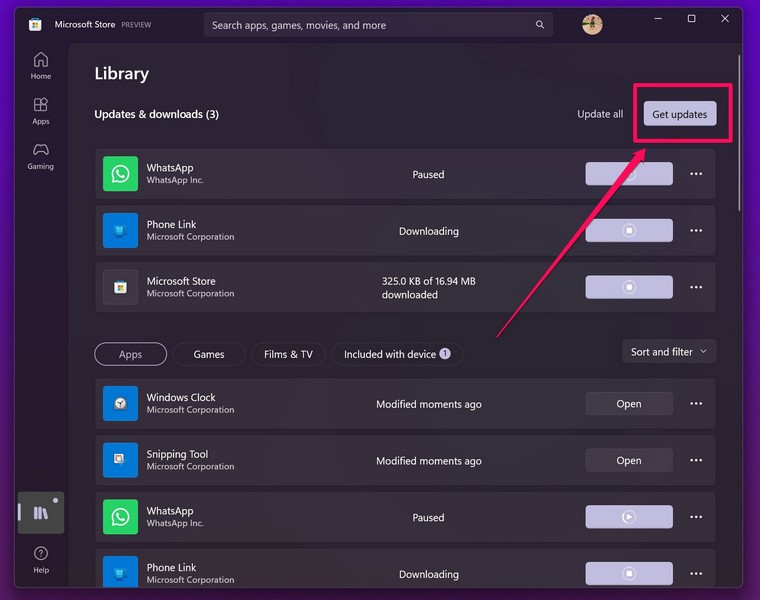
5. If/ when an update for iTunes shows up, click the Get button beside it to install the update on your device.
6. You might need to restart your Windows 11 device after the update process is complete.
How to Uninstall iTunes on Windows 11
Now, if you want to uninstall the iTunes app on your Windows 11 PC or laptop, you can do so easily. Simply follow the steps right below to uninstall the iTunes app from your Windows device:
1. Use Windows + S to launch Windows Search and locate the iTunes app on your PC or laptop.
2. In the search results, right-click on the iTunes app and hit the Uninstall option on the context menu.
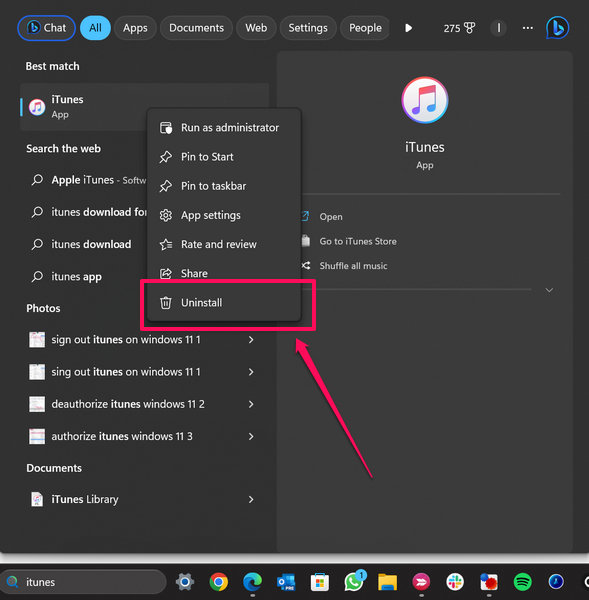
3. Confirm your action on the following prompt.

And you are done! This will uninstall the iTunes app from your Windows 11 PC or laptop.
FAQs
Is iTunes free to download on Windows 11?
Actually, iTunes is a music player app that is free on Windows 11. But notwithstanding, to run it, you need Windows 10 and some other systems.
Can I play music on iTunes for free on Windows 11?
Also, if you have songs stored on your Windows 11 PC or laptop, you can add them to your Library on iTunes free of charge. But to stream songs and music video content in the app, you need an Apple Music subscription.
Is iTunes available for Windows 11?
iTunes is certainly free software that works on Win32 and UWP platforms on Windows 11 PC or laptop. Anyone may access it, whether by downloading it from Apple’s official website or via the Microsoft Store on Windows 11.
Wrapping Up
So yeah, obviously! It is our comprehensive life of iTunes 11 Windows 11 PC and laptop installation and usage. iTunes is a very good music player for Windows 11, but it has some issues that cannot be addressed ahead of time and many users may find it annoying. If you’re having problems with the software on your computer; you can take a look at the provided link to learn how to fix iTunes when it isn’t working on Windows 11.
And, as a consequence, the post can help you with the maximum utilization of all of the iTunes installations for Windows 11 PC or laptop.


